Multi-channel subscription example - How to allow users to subscribe to different topics or channels of information?
Imagine you want to send a massive amount of messages from multiple topics (channels) and you want to let your recipients decide which topics (or channels) they want to receive - themselves.
This is a perfect use case for Default Rule Engine, where you can simply group your audience using Tags, and then target whole groups by simply choosing those Tags.
In this guide, we will take a look at how to automate the process of grouping the audience with a keyword-driven solution.
1. Define your audience with Tags
You can easily define your audience structure by simply creating one Tag for each audience group you’re planning to have.
For the sake of this guide, let’s assume we want to target WhatsApp Users with 3 different topics:
Weather
Sport
News
Each User will be able to choose the topic with a text message. Also, each User can subscribe to receive messages from multiple topics at once.
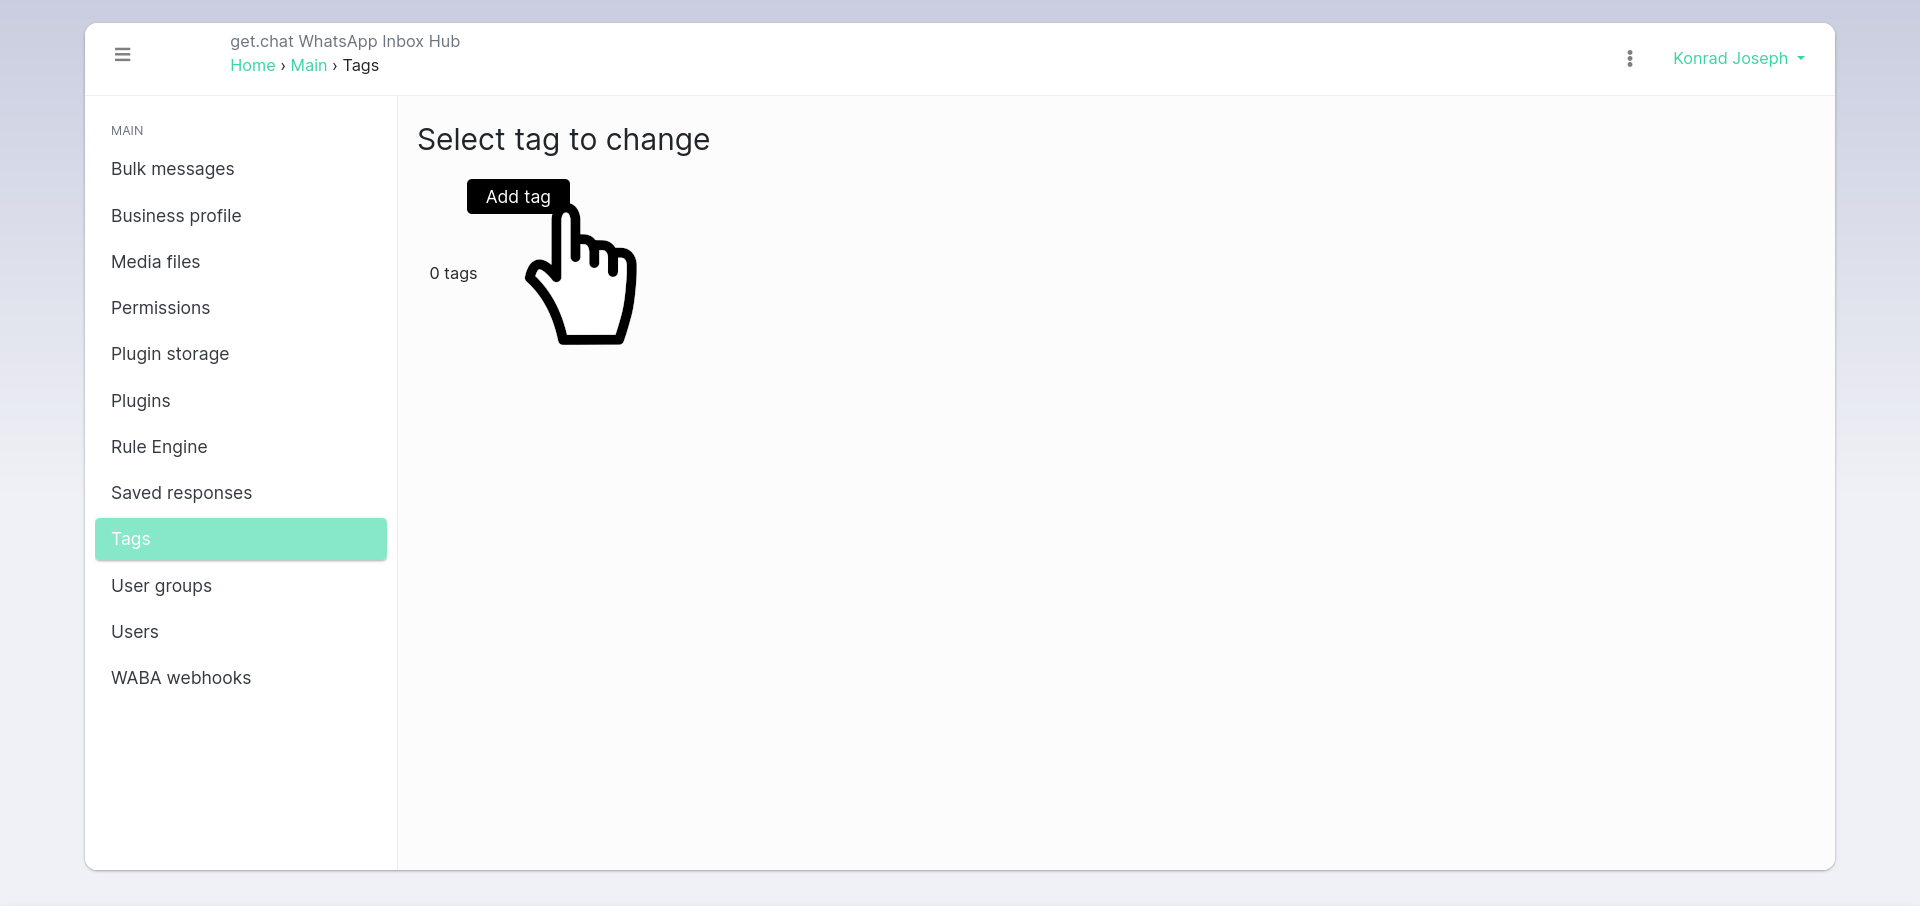
To start, go to the Tags section of the Admin Panel and click “Add tag” button:
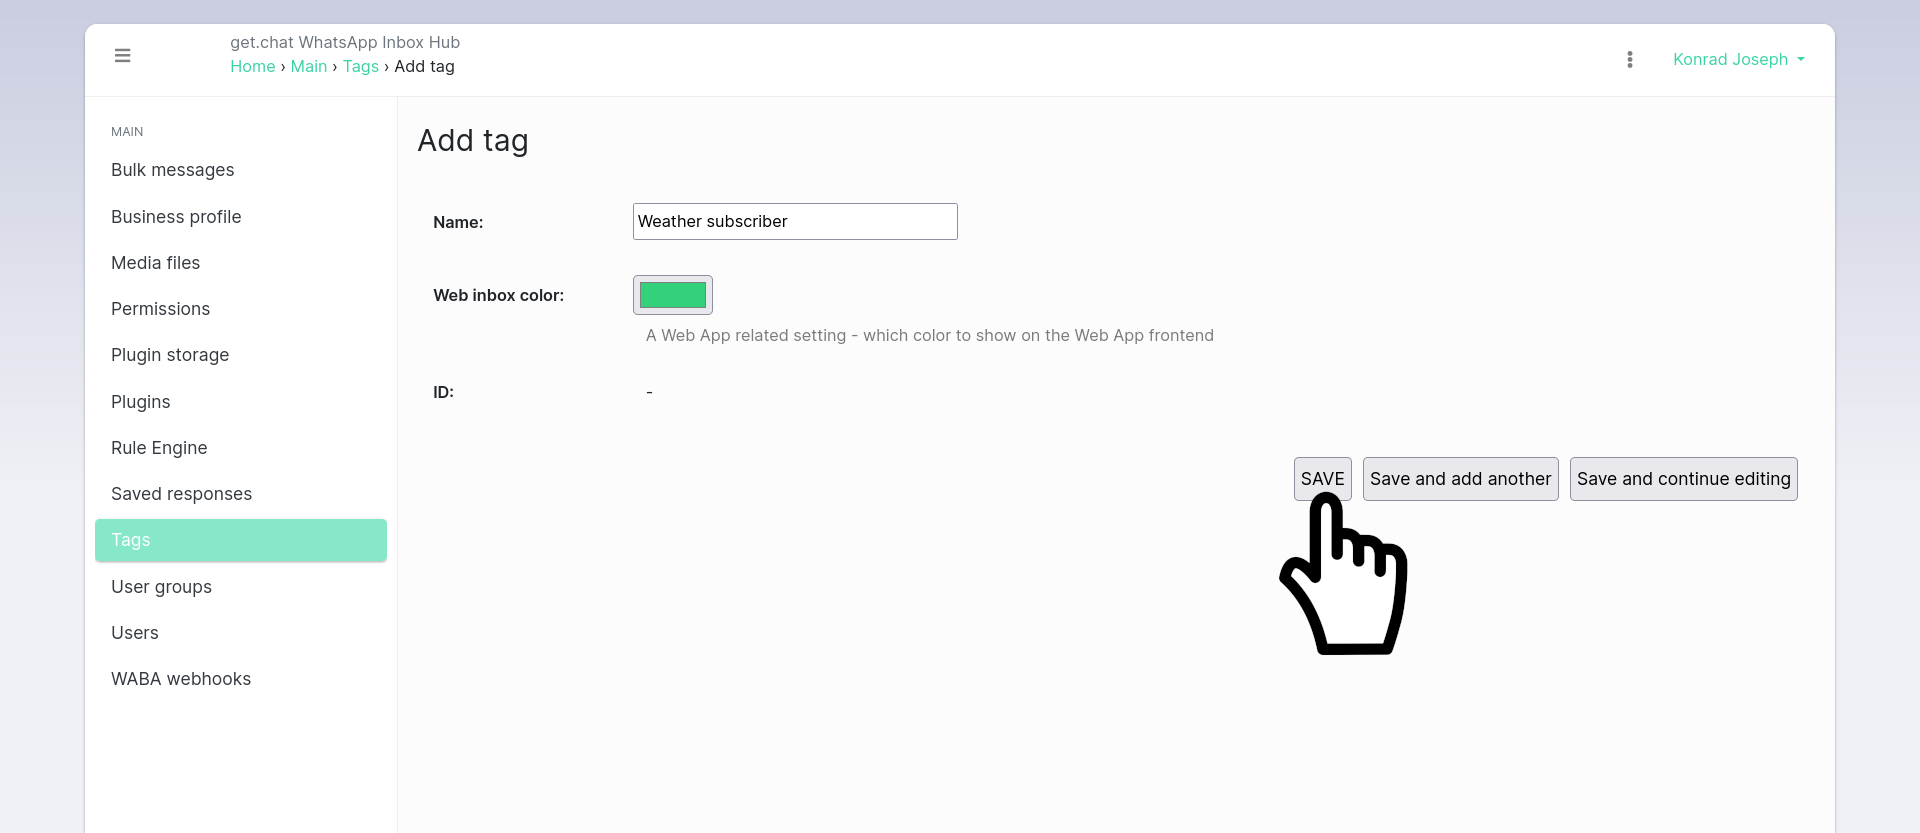
Let’s add the subscriber tag for our Weather topic. On the “Add tag” page, fill in the necessary details and click the “SAVE” button:
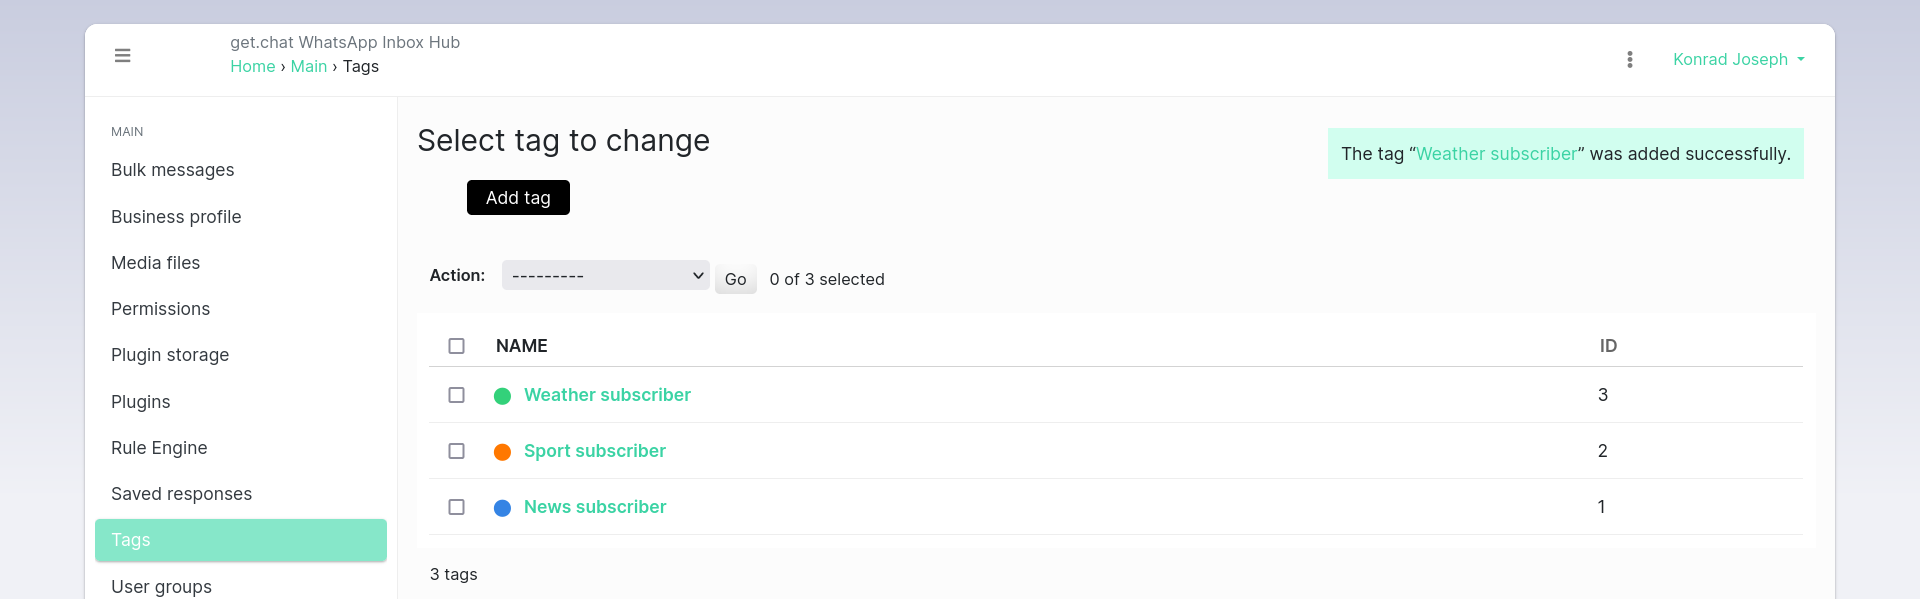
Repeat the same process for all other topics you want to have. This should give you a result similar to the screenshot below:
2. Create welcome message
To be crystal clear with your potential recipients, it is recommended that you create some sort of a welcome message telling WhatsApp users what is happening and what are the options.
Let’s go to Rule Engine section of the Admin Panel and click Add new Rule:
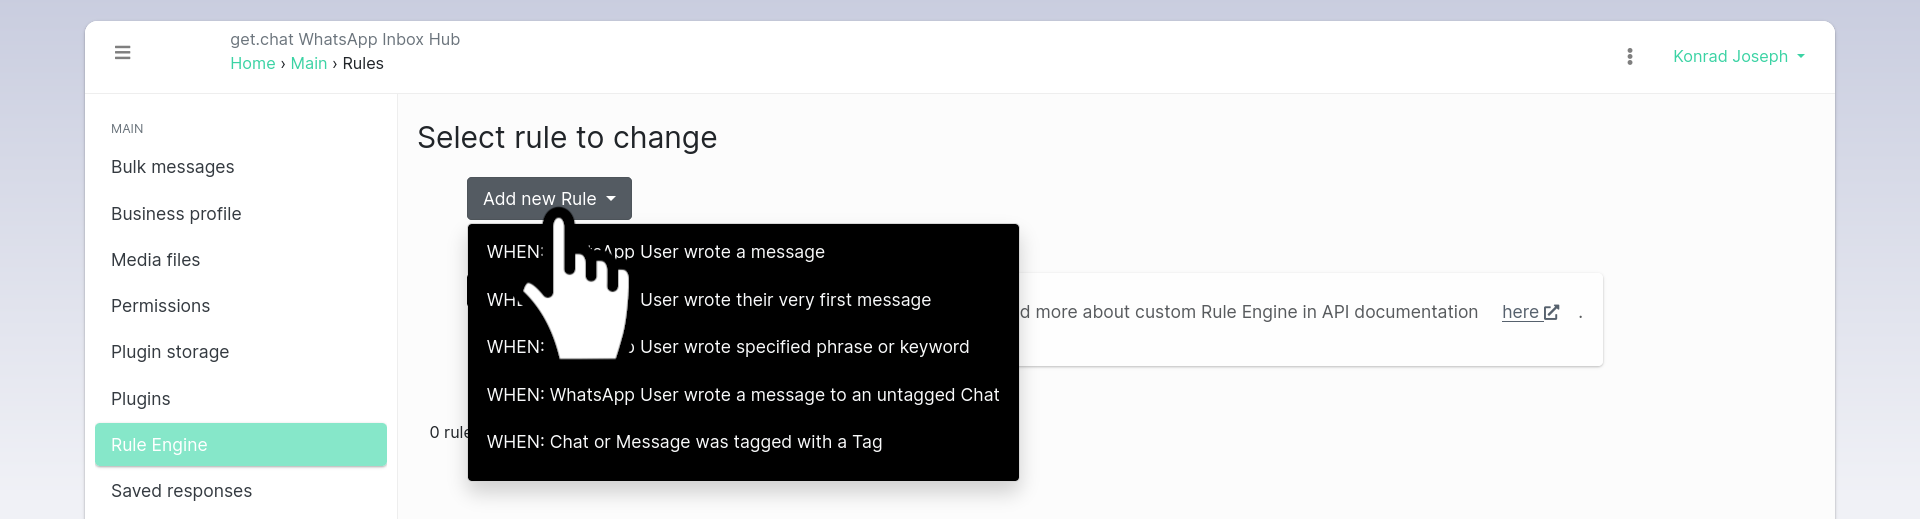
This will show you multiple options of the “trigger” of the Rule we are creating. In this case we will be creating a Rule that is activated whenever someone wrote a message to us, but they are not (yet) subscribed - so in other words, they haven’t got any Tag on their Chat yet. Choose the following option: “WHEN: WhatsApp User wrote a message to an untagged Chat”
On the next page, we will have a form of many different options. It is possible to make sophisticated rules in the Rule Engine so that multiple actions are triggered by the selected rule which is the “trigger” event.
In our case, our rule won’t be too complicated.
To create your welcome message just scroll down to the very bottom of this form and type your text in the Reply with automated response section:
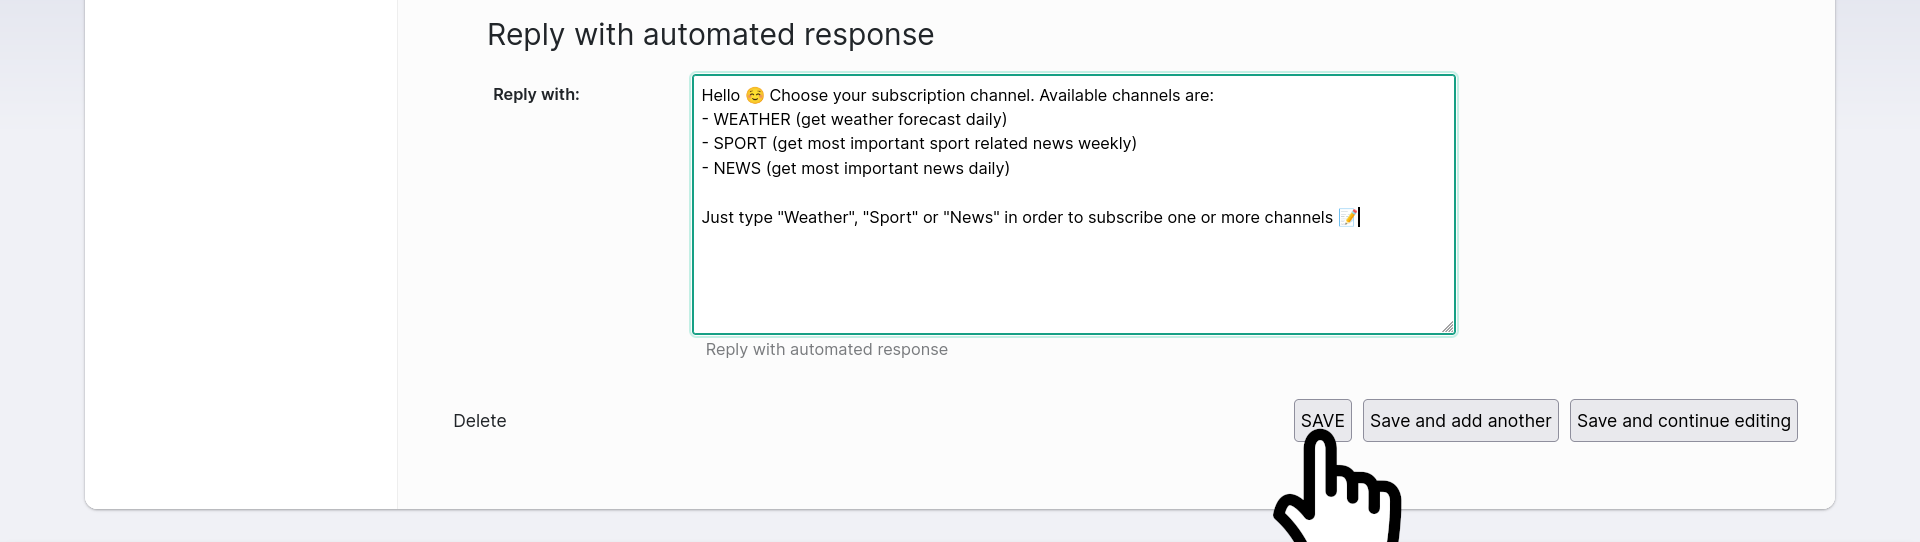
Looks good? Click Save and now let’s move into the more interesting part.
3. Create “opt-in” Rules
After you have your welcome message ready, it’s time to make it interactive so users can interact with it and select a topic of their liking by typing it down as they were instructed.
In our example we told our Users they can type following keywords:
WEATHER (get weather forecast daily)
SPORT (get most important sport related news weekly)
NEWS (get most important news daily)
The example below documents the process of adding a rule/ trigger for the WEATHER keyword/topic. The exact same process needs to be repeated to add the rest of the topics/keywords (The keywords are the only variable of course).
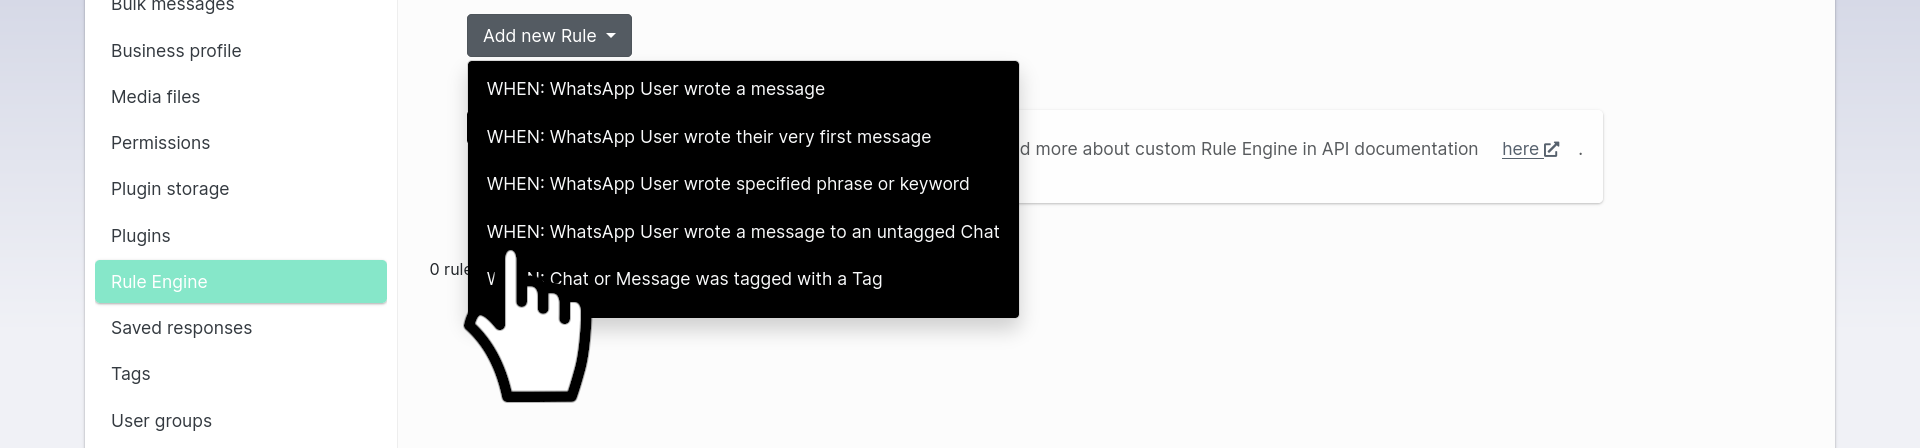
Use the Add new Rule button, but this time choose the following option: “WHEN: WhatsApp User wrote specified phrase or keyword”.
We want the user to be subscribed on the “Weather” keyword, so on the next page type the “Weather” keyword into the “Exact phrase or keyword” field:
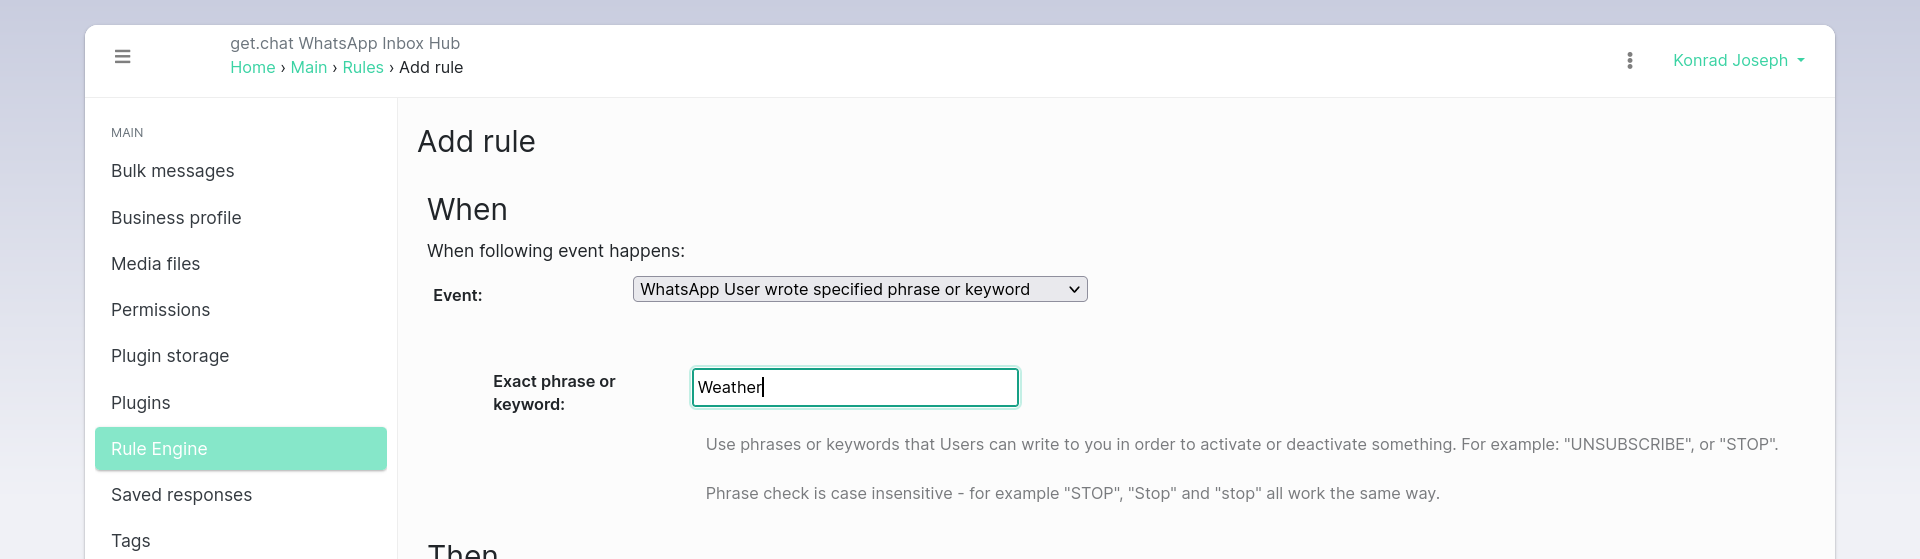
Note that keyword check is case-insensitive - “WEATHER”, “Weather” and “weather” all work the same way.
Now we want to actually manage our subscribers. Scroll into the middle of the form and choose the Tag we created previously under the Add Tag to Chat section.

This will tag the Chat automatically with the corresponding topic(s) whenever a User writes to us with a specified keyword.
In this scenario, we assume users are giving us their consent when writing to us. You are obliged to include this information somewhere on your website or e-mail or any source you are linking to your WhatsApp number. To be absolutely transparent with your WhatsApp recipients, you should as well message them with an automated reply that is made after a user is automatically tagged. To do that, just scroll down to the bottom section of the same page and provide some kind of welcome message, for example:
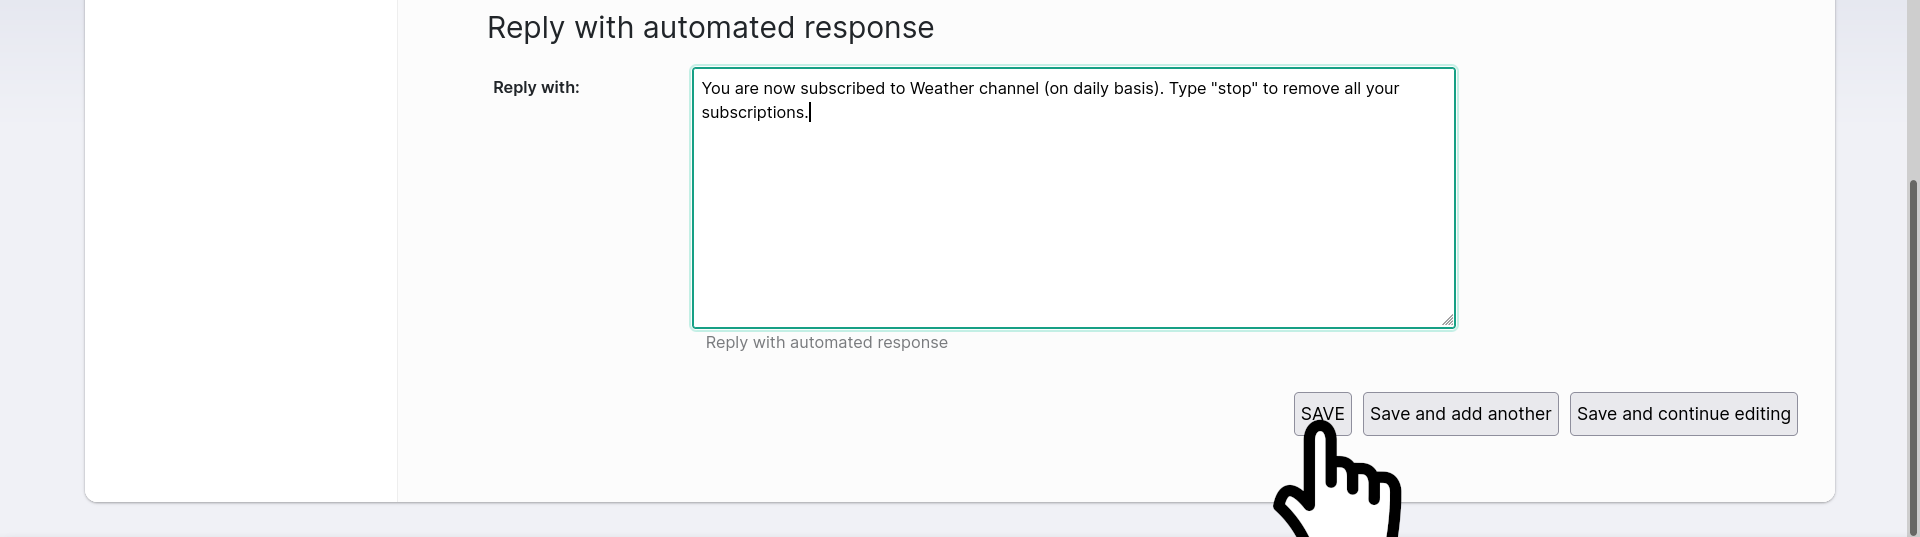
If you check the Reply With: text in the screenshot closely, you will notice we mentioned that the user can optionally reply with a “Stop” message, and this will make the user automatically unsubscribed - we will move into setting this up in the “Create opt-out Rule” section:
You are now subscribed to Weather channel (on daily basis). Type “stop” to remove all your subscriptions.
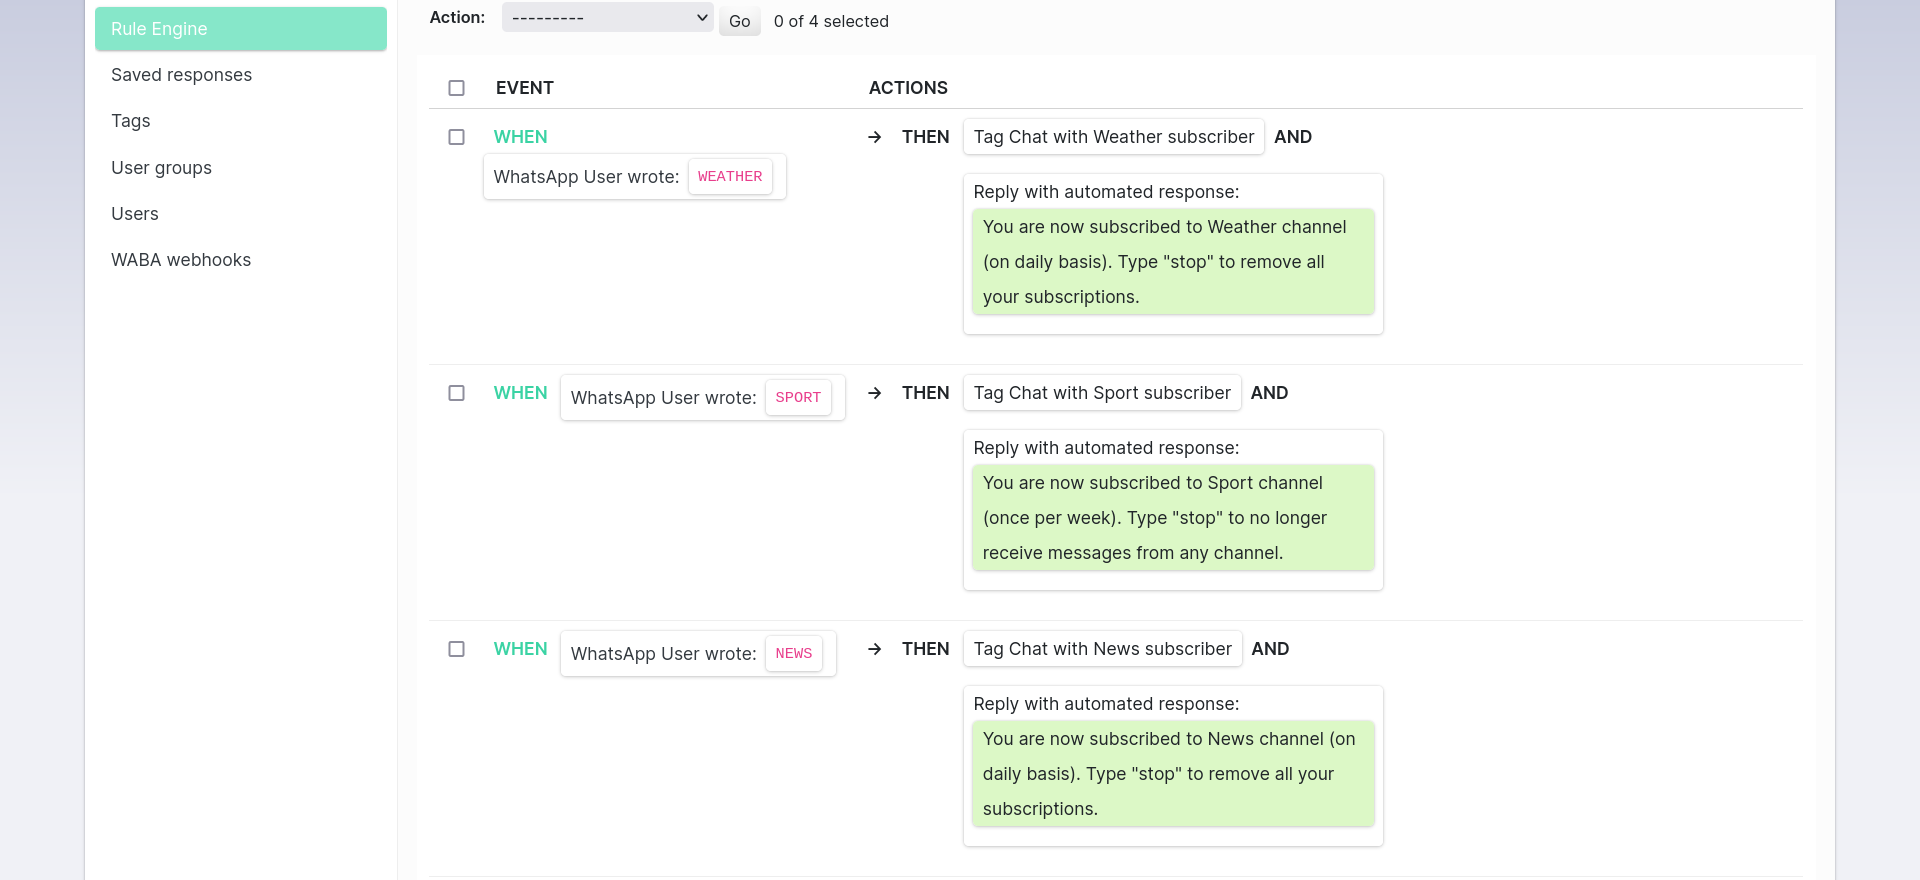
OK! Let’s Save it and repeat all those steps for your other topics (Sport, News, in our example).
After you have repeated all the steps for all Tags, you should see a result similar to this:
This provides you a setup where users are automatically tagged. Now the last thing to do is to configure them being untagged as well.
4. Create “opt-out” Rule
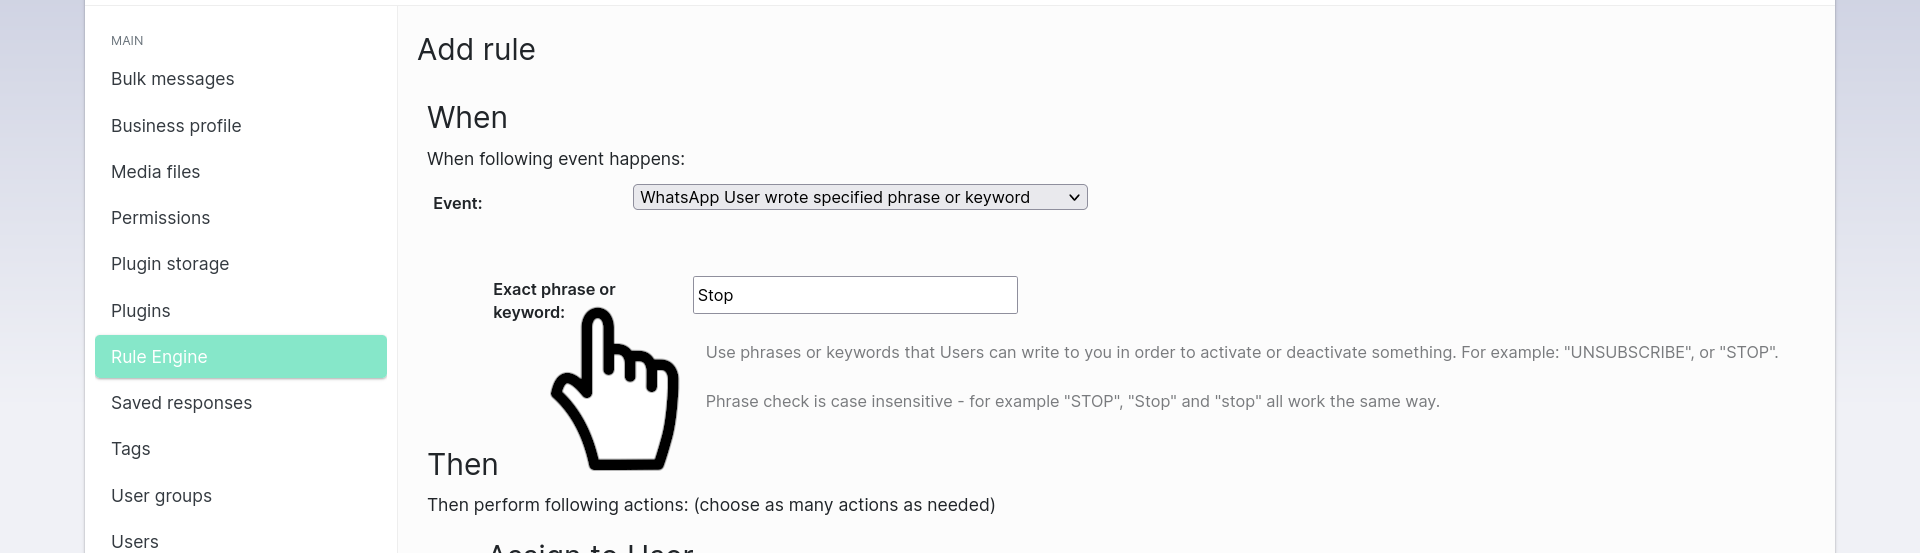
The “opt-out” Rule will be created in a similar way but with different options. Again, use the Add new Rule button, and the same option: “WHEN: WhatsApp User wrote specified phrase or keyword”.
We want the user to be unsubscribed when the “Stop” keyword is triggered, so on the next page type the “Stop” keyword into the “Exact phrase or keyword” field:
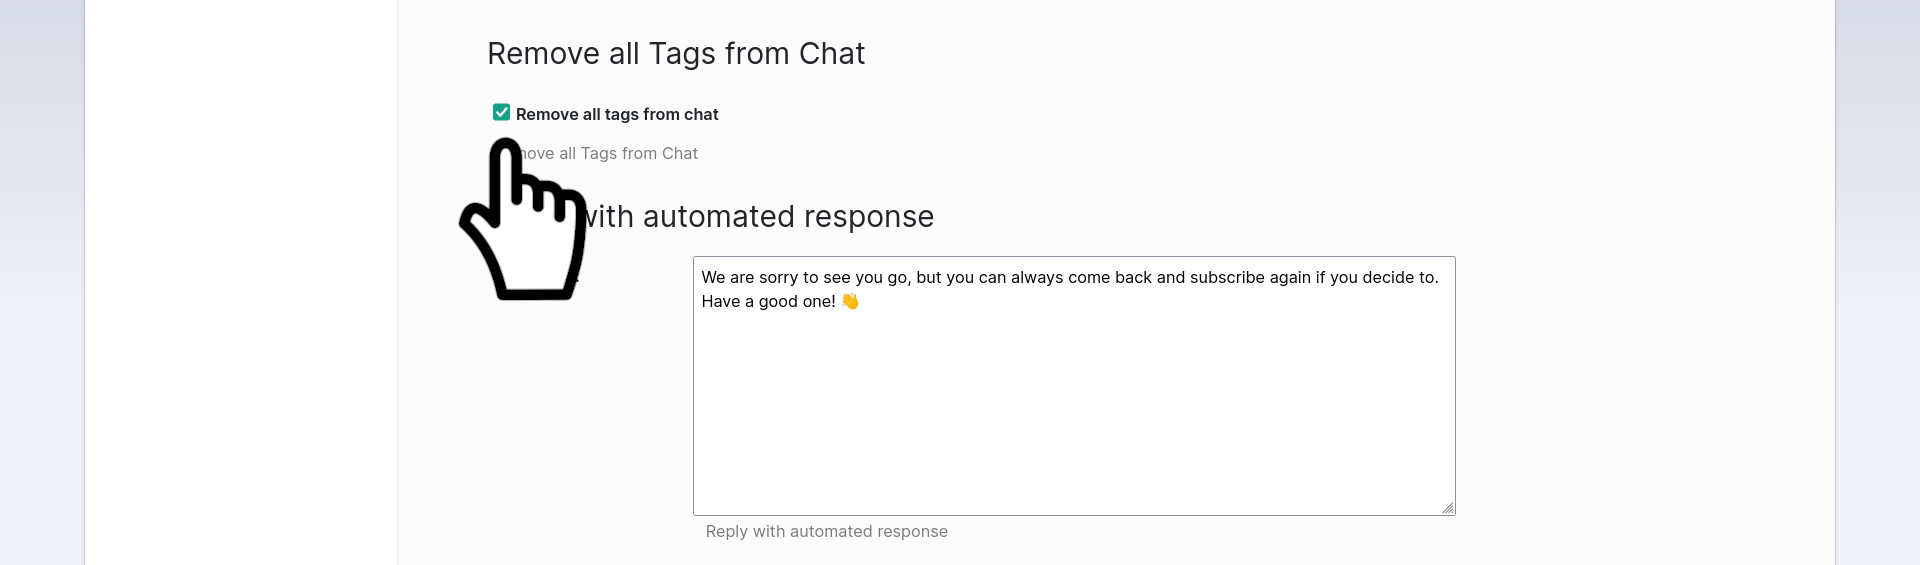
Alright, so we have the action trigger specified. Now we need to specify the action itself which is to unsubscribe the user that sends “Stop”. To achieve this, you should use the Remove all tags from chat option.
Done? Almost there. Remember to add an automated response, to keep the communication with your recipients crystal clear and reassure them that they have successfully unsubscribed. How about something like:
We are sorry to see you go, but you can always come back and subscribe again if you decide to. Have a good one! 👋
That’s all! You can now click Save and you will see a preview of your entire setup.
5. Try it!
OK, we are done, but… how does it look in action?
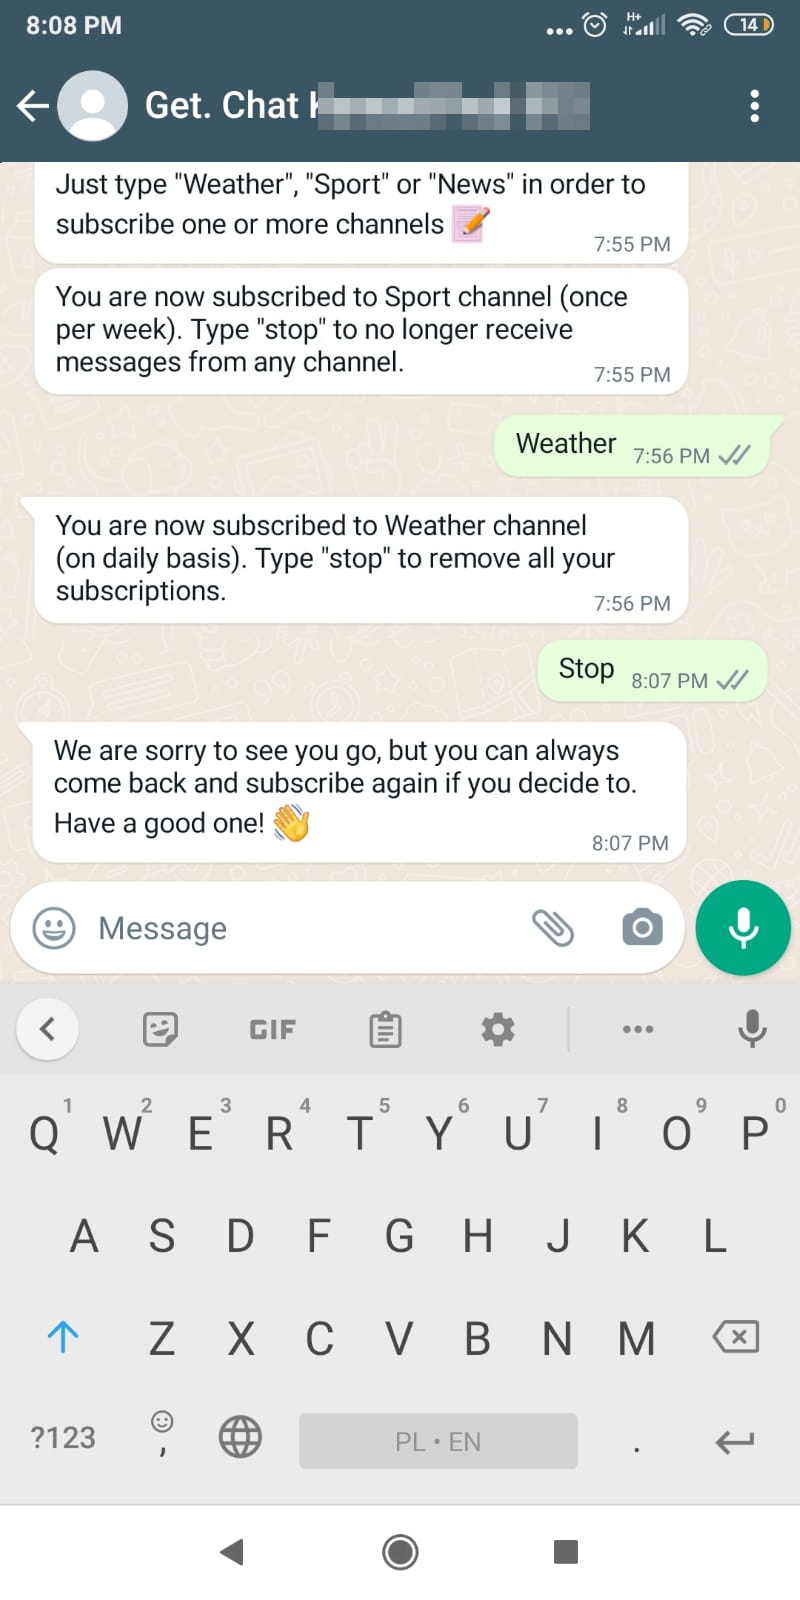
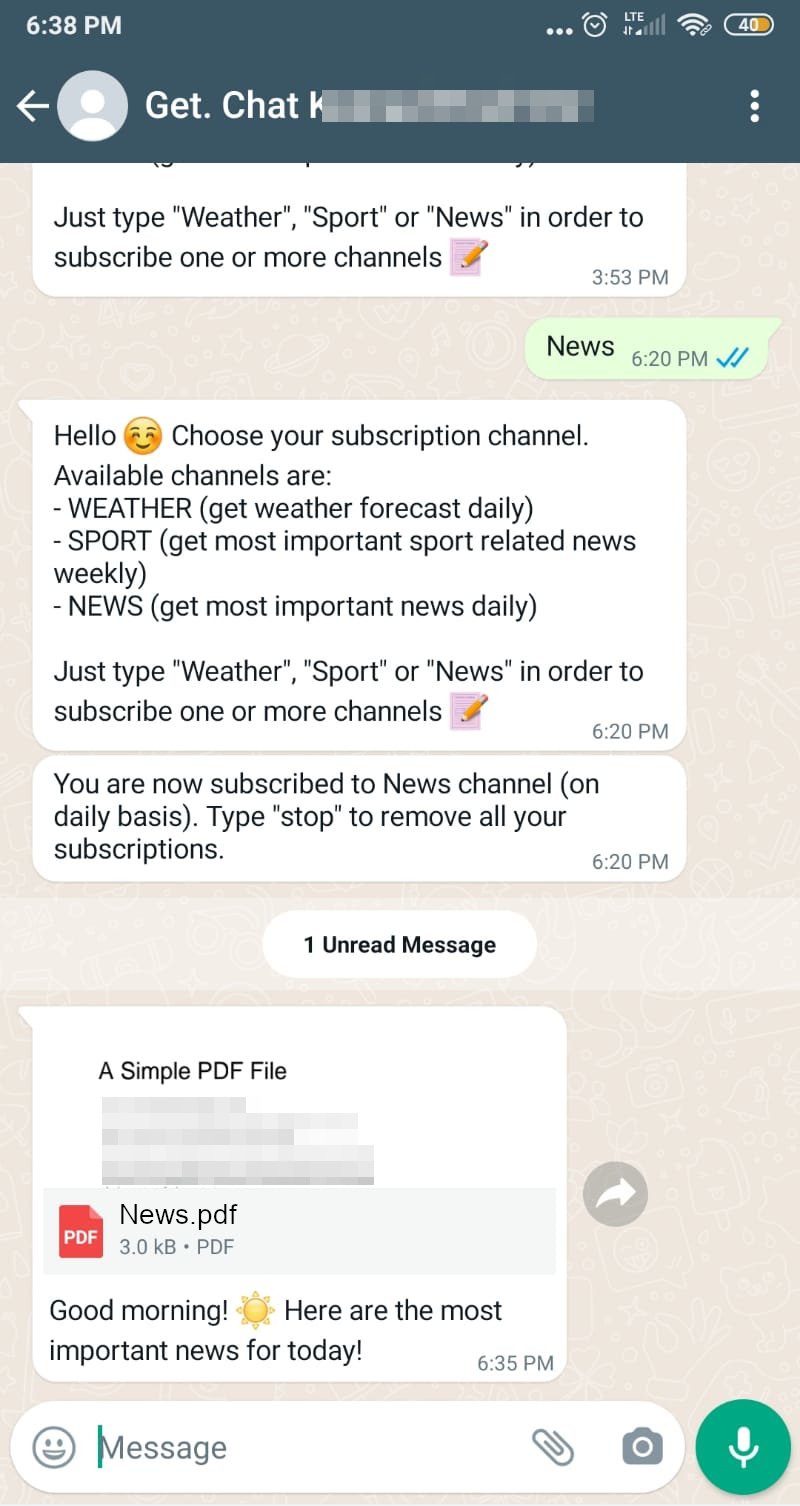
Let’s open up WhatsApp messenger and write a test message into our inbox. We have a nice welcome message. We can see that on the Inbox side as well:
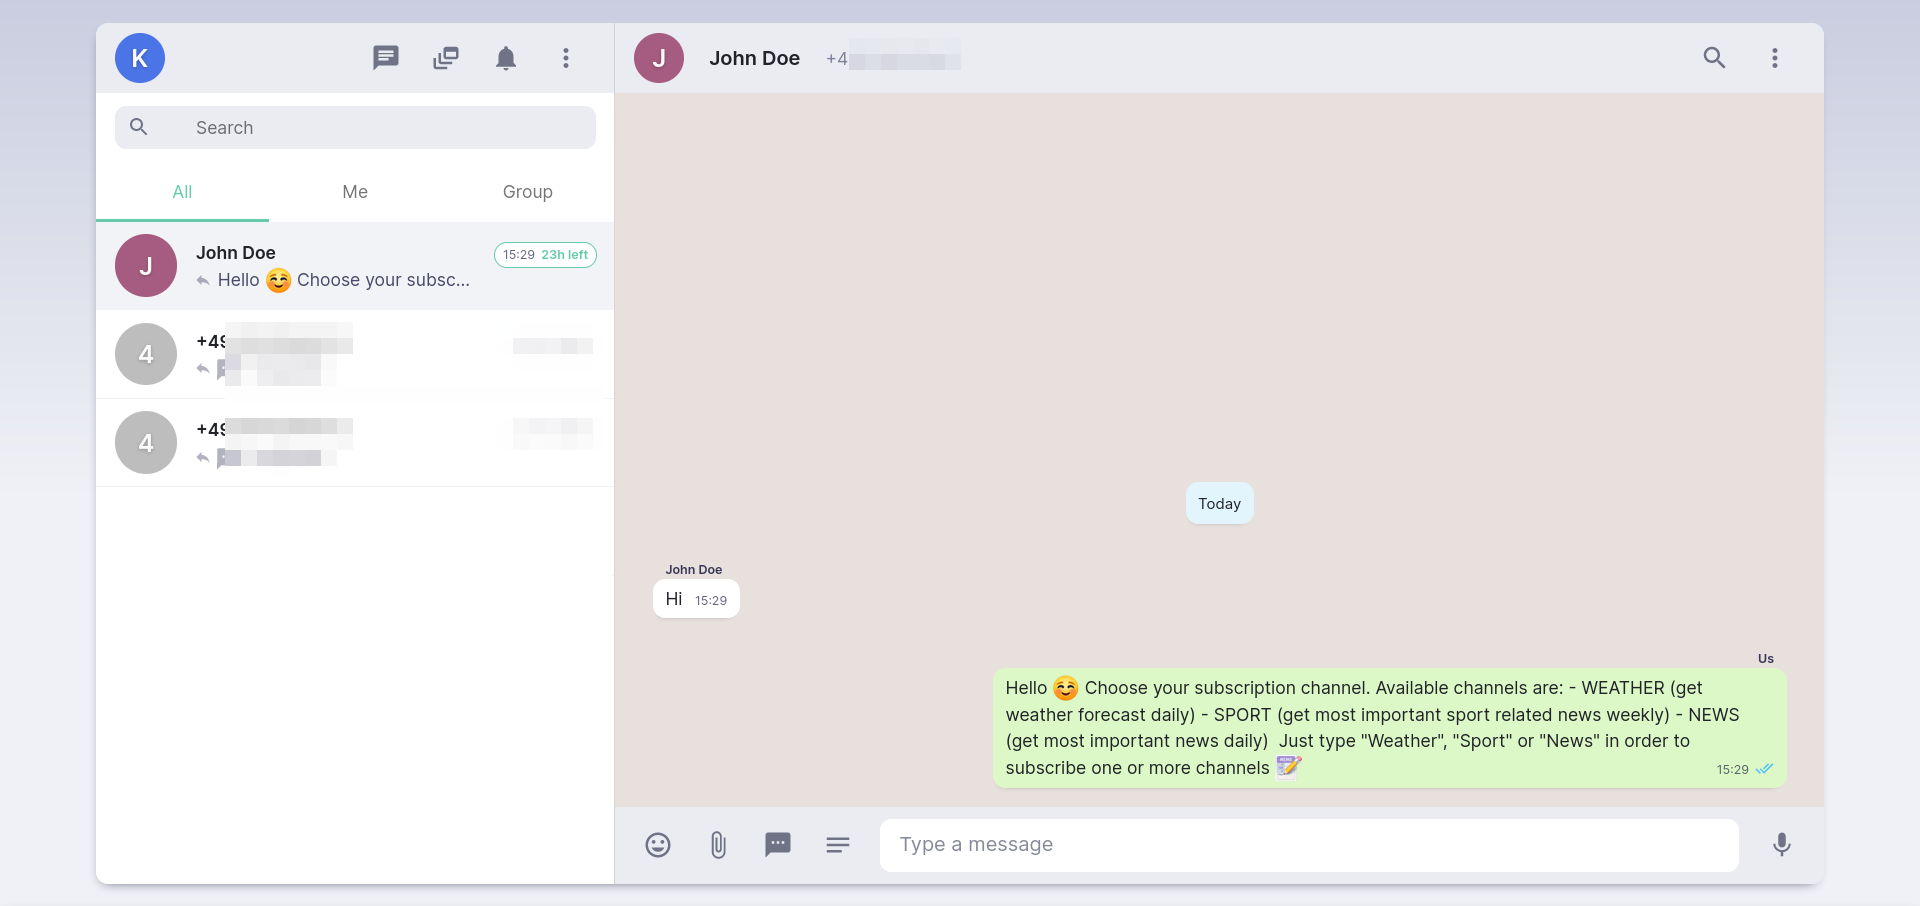
OK, let’s pretend the user subscribed to our “News” topic right now. We can simulate it by writing into our inbox “News” message. Again, writing “News”, “news”, “NEWS” or any kind of capitalized version (including “nEwS”) all works the same way:

Looks good. This is a nicely automated chat. Let’s assume you made it to collect a few or more subscribers, and you want to message them all at once. In our example we will have only one subscriber, but let’s not worry about it much.
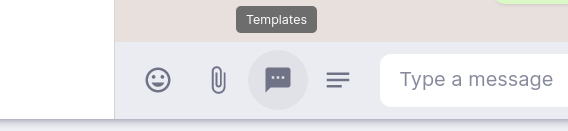
In the inbox chat view, pick the Templates option - it doesn’t matter on which Chat you will pick this option:
Choose the template you want and click Send.
In the next step, you will have a popup with a template form. In our example we used a template that is sending a PDF file to the user. For such a template, you can upload the PDF file directly using the form:
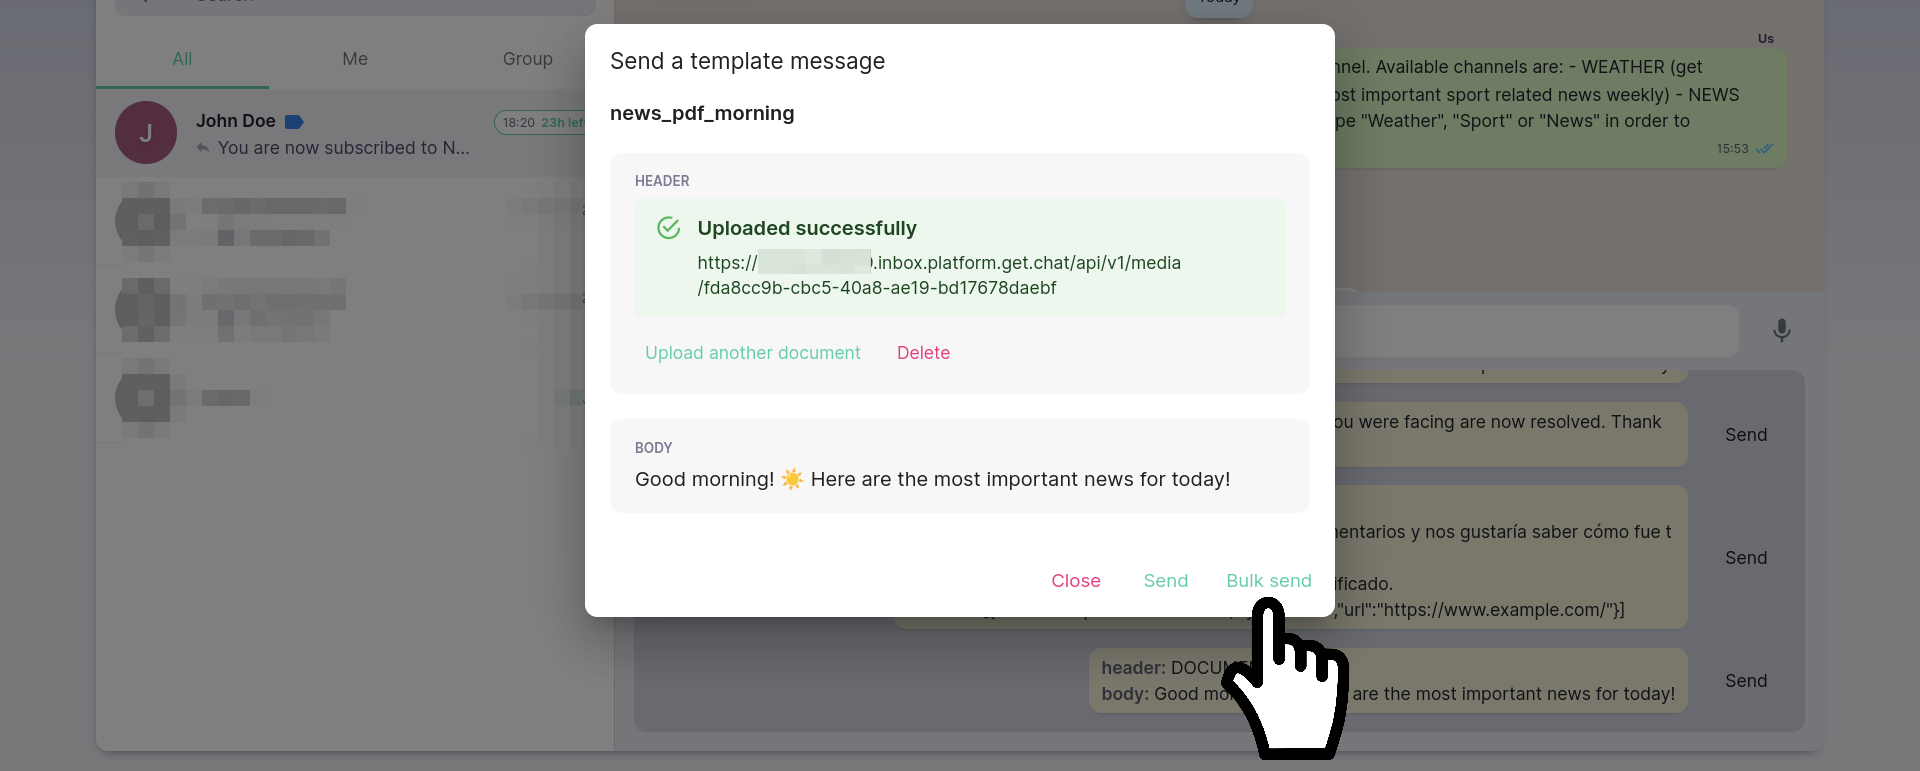
Click Bulk send. This will lead you into a UI that allows you to target users directly or target them by tags.
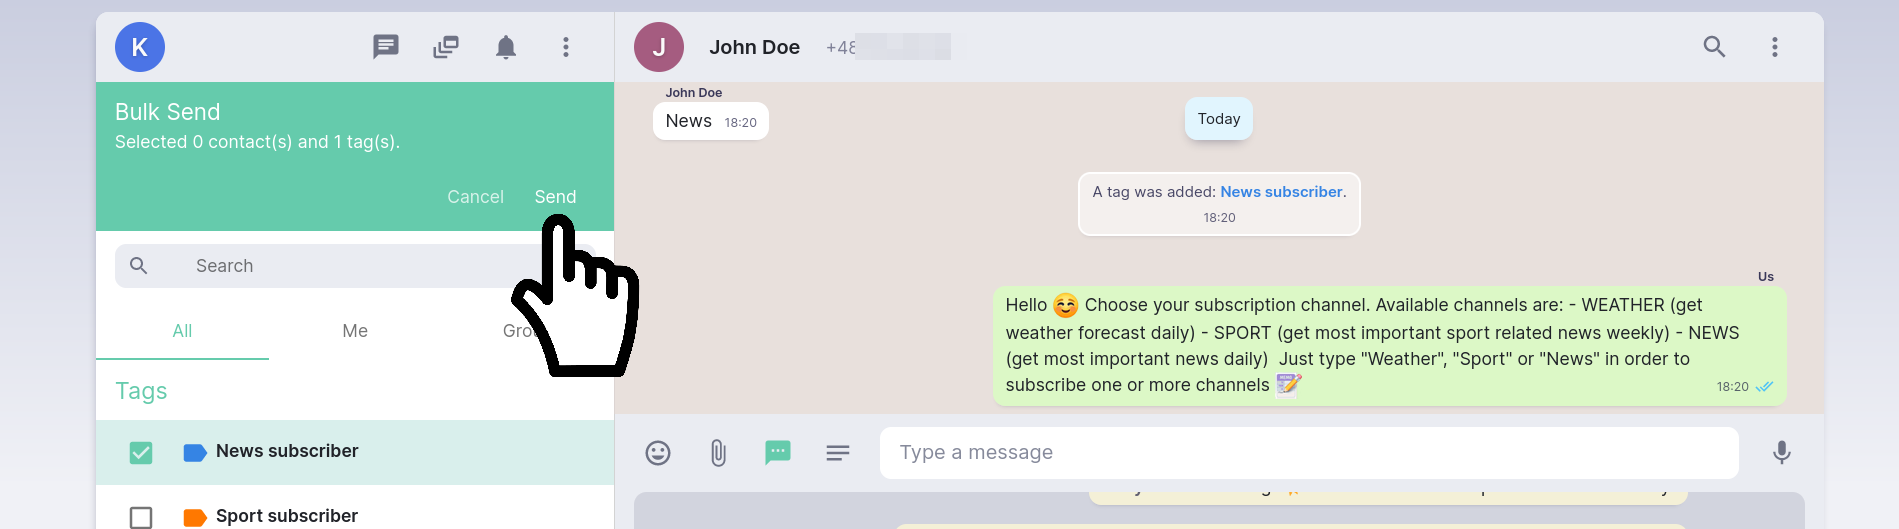
The second option is actually what we are interested in - select the tag you want to target (in our case this will be News subscriber) and then click the Send button:
On the lower left you will see the progress bar of all targeted users, so the hundreds or millions you targeted right now (or only one as in below picture):

And this is the result your WhatsApp subscribers should end up with, based on the template we used:
Cool! Now, let’s see what happens when a user decides to opt out by writing a Stop message:
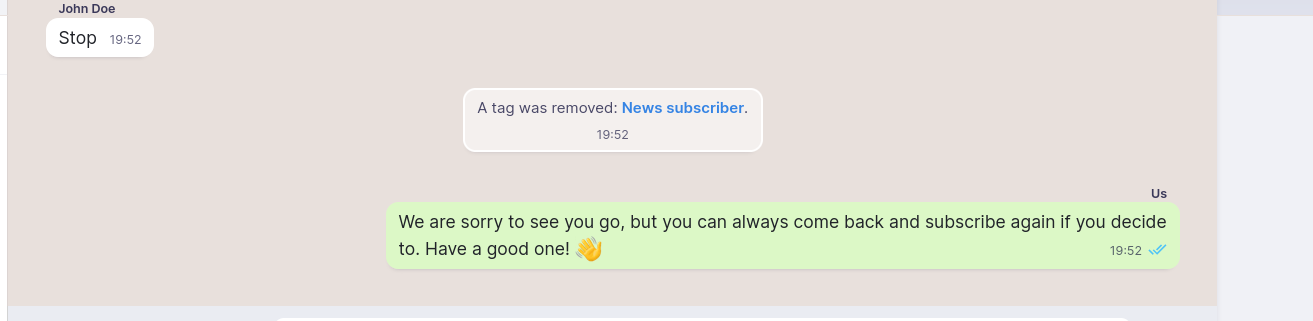
After they decide to, the user is automatically untagged. When targeting users by this Tag in the future, this user won’t be considered.
More than one Tag
All this will work similarly when user chooses more than one topic:
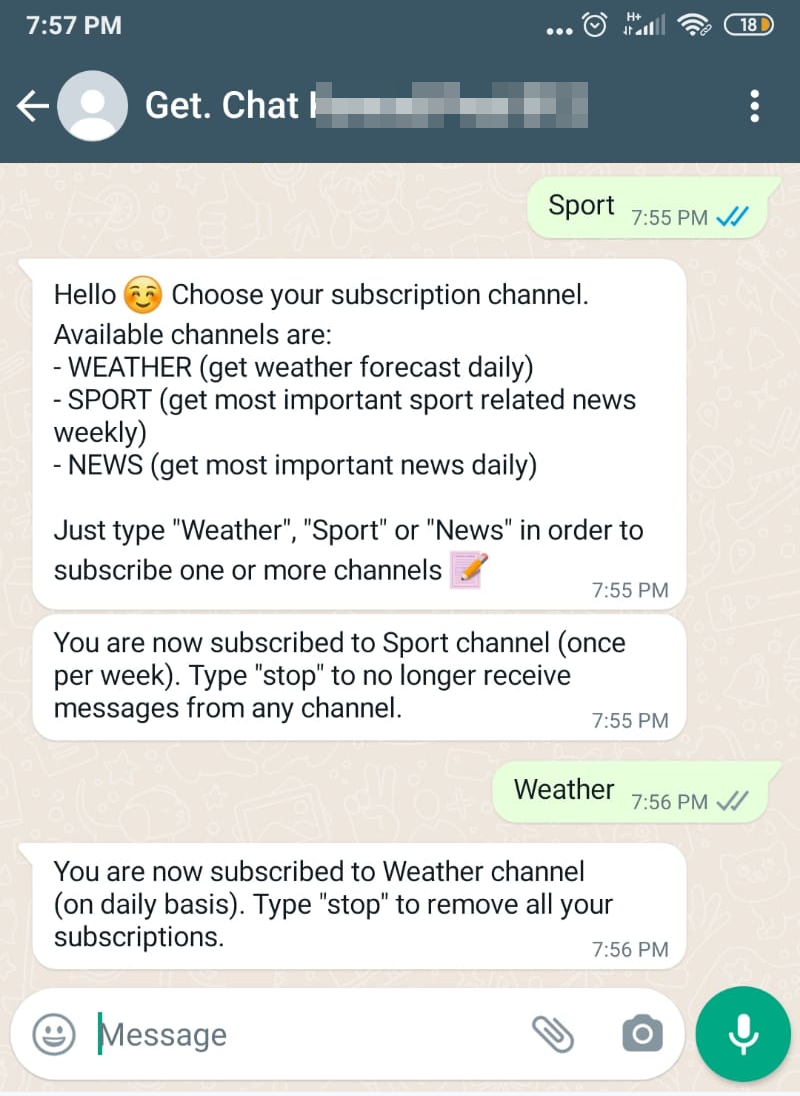
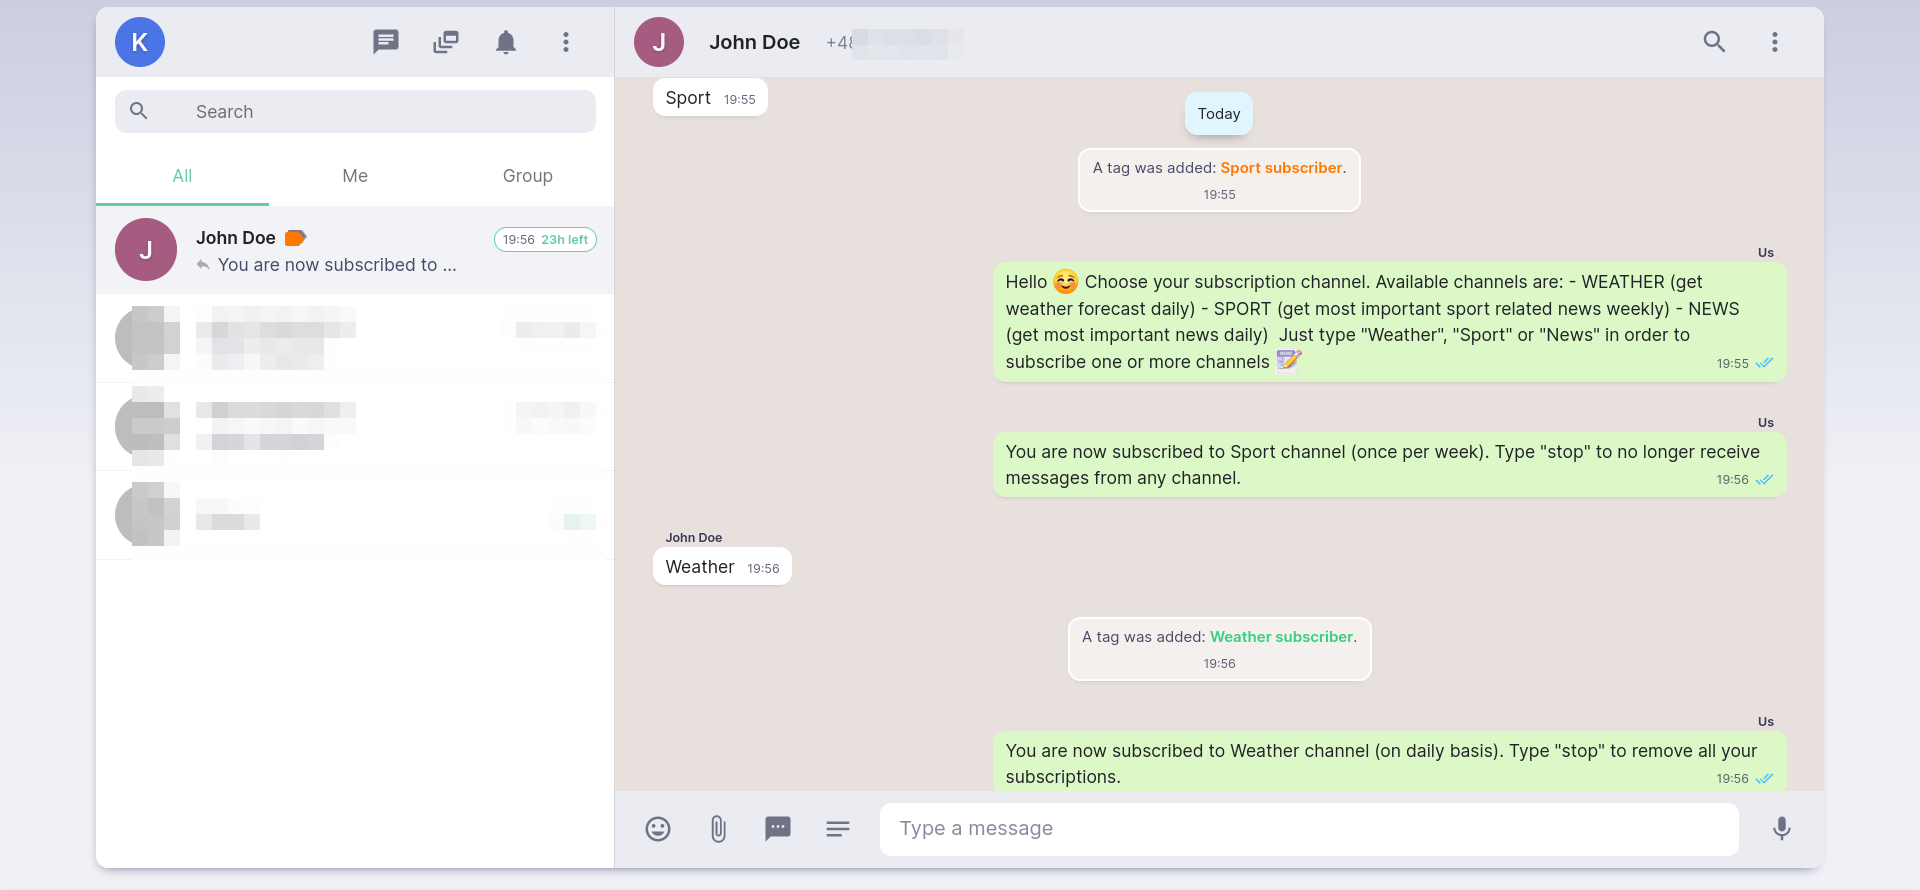
Remember when a user writes “Stop”, in our setup, they will be unsubscribed from all channels at the same time: