Singe channel subscription example - How can I make them easily subscribed to my massively sent messages?
Let’s assume you are facing the following problem. You’re a supermarket network campaign manager, and you want to enable your customer base with a way of subscription so that they can receive some sort of promotional flyers or booklets on regular basis. For this to happen, you need to somehow keep the subscribed (and unsubscribed) WhatsApp users in one place and target them with a bigger amount of messages on a regular basis easily.
That’s easily doable when combining Rule Engine solution with Tags.
1. Create a Tag
For the sake of our example, we will create a Tag that will allow us to distinguish subscribed users.
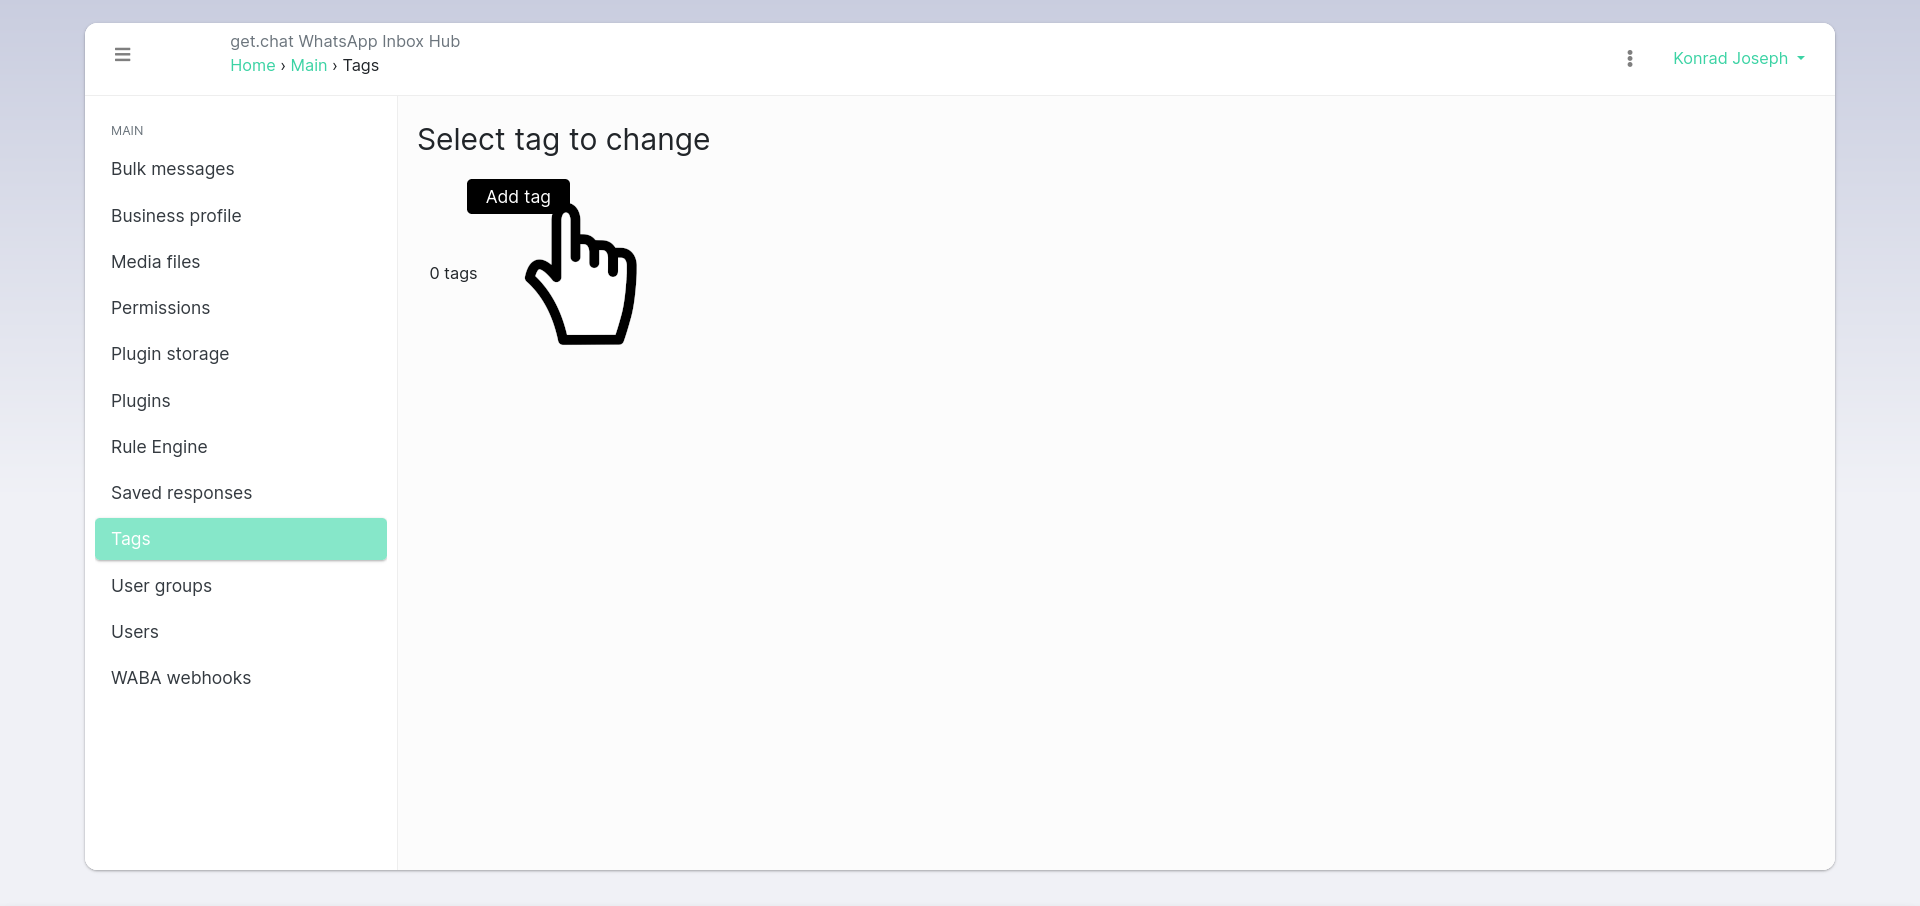
To do that, go to the Tags section of the Admin Panel and click “Add tag” button:
Here, you can create a new Tag, let’s say “Subscribed” - that will indicate which users are actually subscribed:
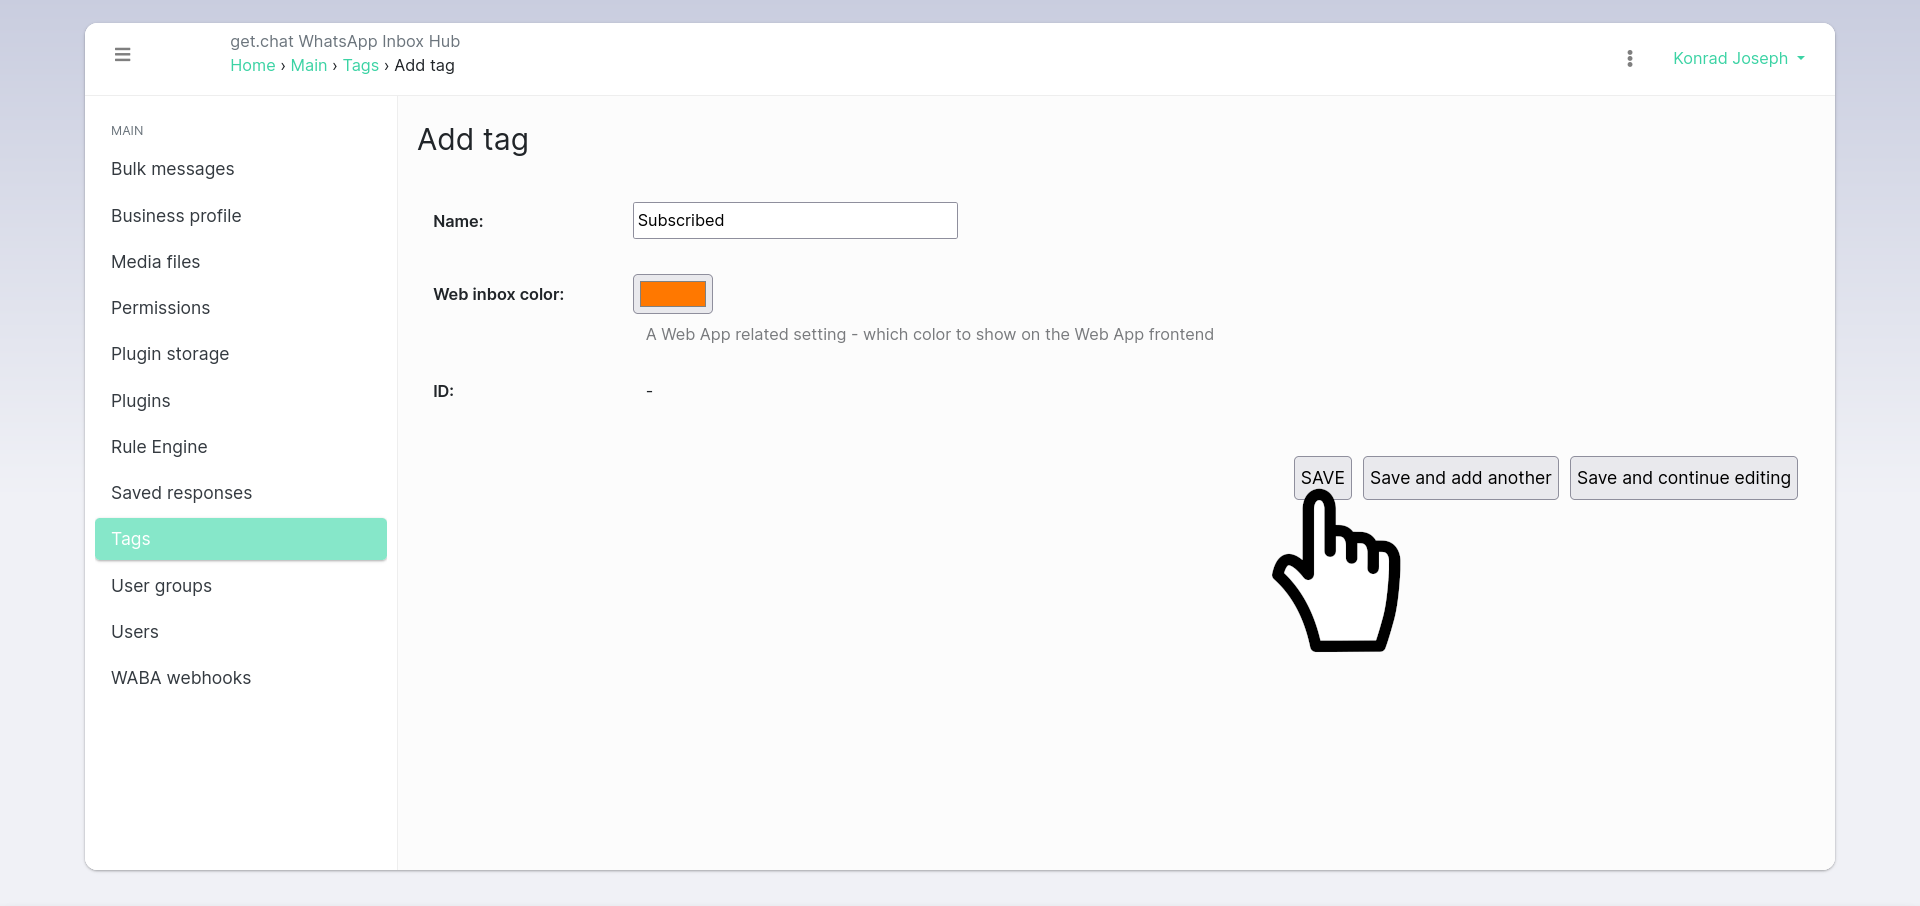
You can choose whatever color suits you. Using different colors makes sense when there are more than one Tag types in your inbox. Click Save and your Tag is now created.
This tag will be used to group your WhatsApp recipients into opted-in and opted-out users. But how to get their opt-in without taking any of your valuable time, or time of your team members?
Here, the Rule Engine comes into play - we can use Rule Engine functions to set up a very simple automation logic.
2. Create “opt-in” Rule
To have it set up, go into the Rule Engine section of the Admin Panel and click Add new Rule:

This will show you multiple options of the “trigger” of the Rule we are creating. In this case we will be creating a Rule that is activated whenever someone wrote a message to us, but they are not (yet) subscribed - so in other words, they haven’t got any Tag on their Chat yet. Choose the following option: “WHEN: WhatsApp User wrote a message to an untagged Chat”

On the next page, we will have a form of many different options. It is possible to make sophisticated rules in the Rule Engine, so that multiple actions are happening on the “trigger” event.
But in our example, what we want to do is just scroll into the middle of the form and choose the Tag we just created while ago under the Add Tag to Chat section.

This will make the Chat tagged automatically whenever a new user writes to us (user’s Chat doesn’t yet have any Tag applied).
In this scenario, we assume users are giving us their consent when writing to us. You are obliged to include this information somewhere on your website or e-mail or any source you are linking to your WhatsApp number. To be absolutely transparent with your WhatsApp recipients, you should as well message them with automated reply that is made after user is automatically tagged. To do that, just scroll to the bottom section of the same page and provide some kind of welcome message, for example:
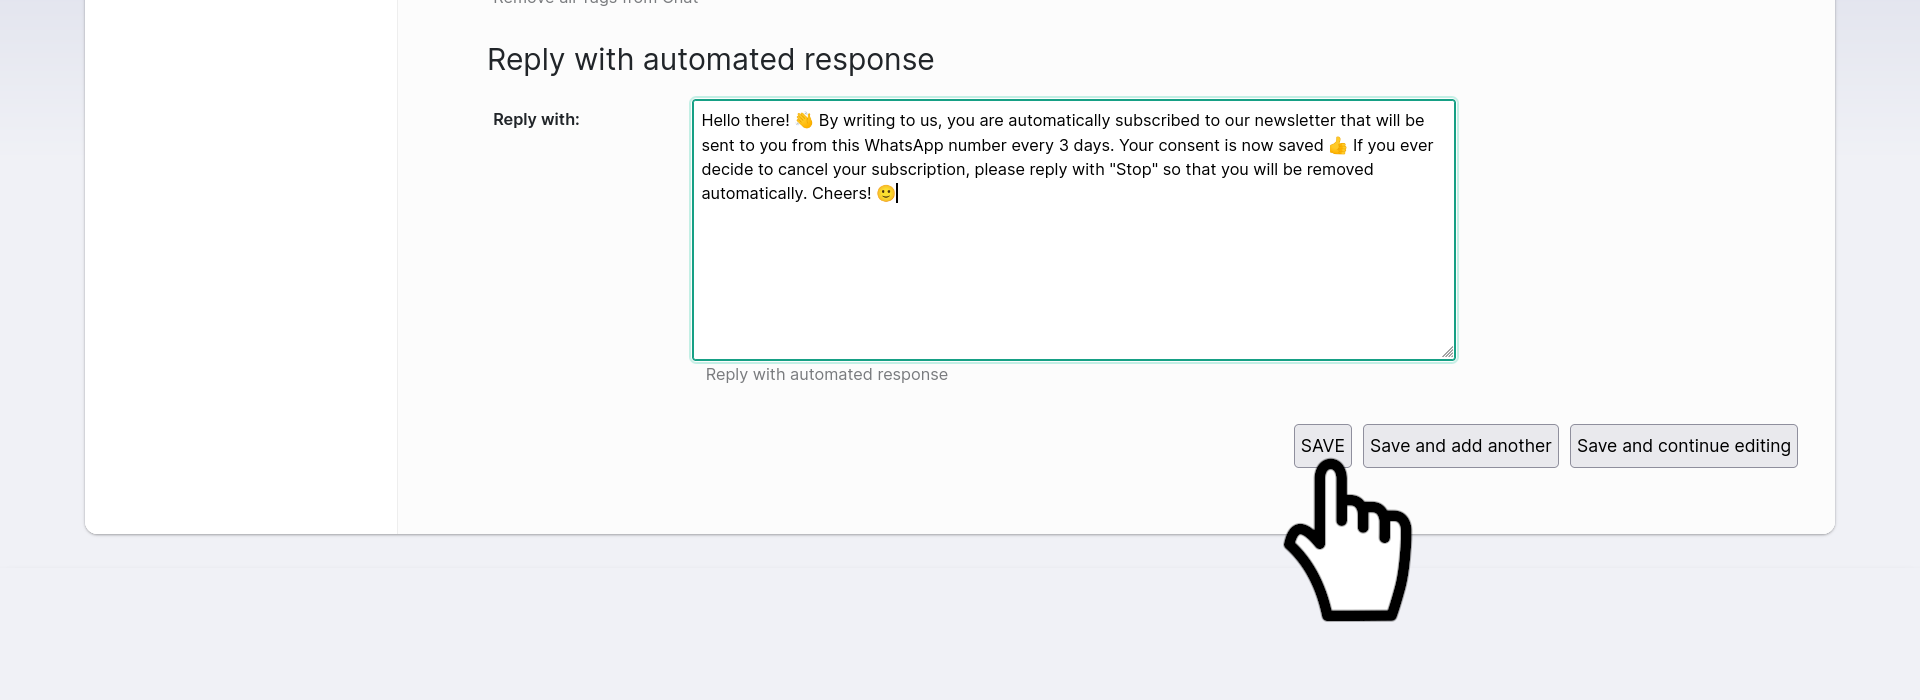
If you read closely, you will notice we mentioned that user can optionally reply with “Stop” message, and this will make the user automatically unsubscribed - we will move into setting this up in a short while:
Hello there! 👋 By writing to us, you are automatically subscribed to our newsletter that will be sent to you from this WhatsApp number every 3 days. Your consent is now saved 👍 If you ever decide to cancel your subscription, please reply with “Stop” so that you will be removed automatically. Cheers! 🙂
… we’ve also used emoji because… why not? ;) It is good to consider emojis if you want to give your messages some more friendly sounding.
OK! Let’s Save it now and check the result on the Rule Engine page:
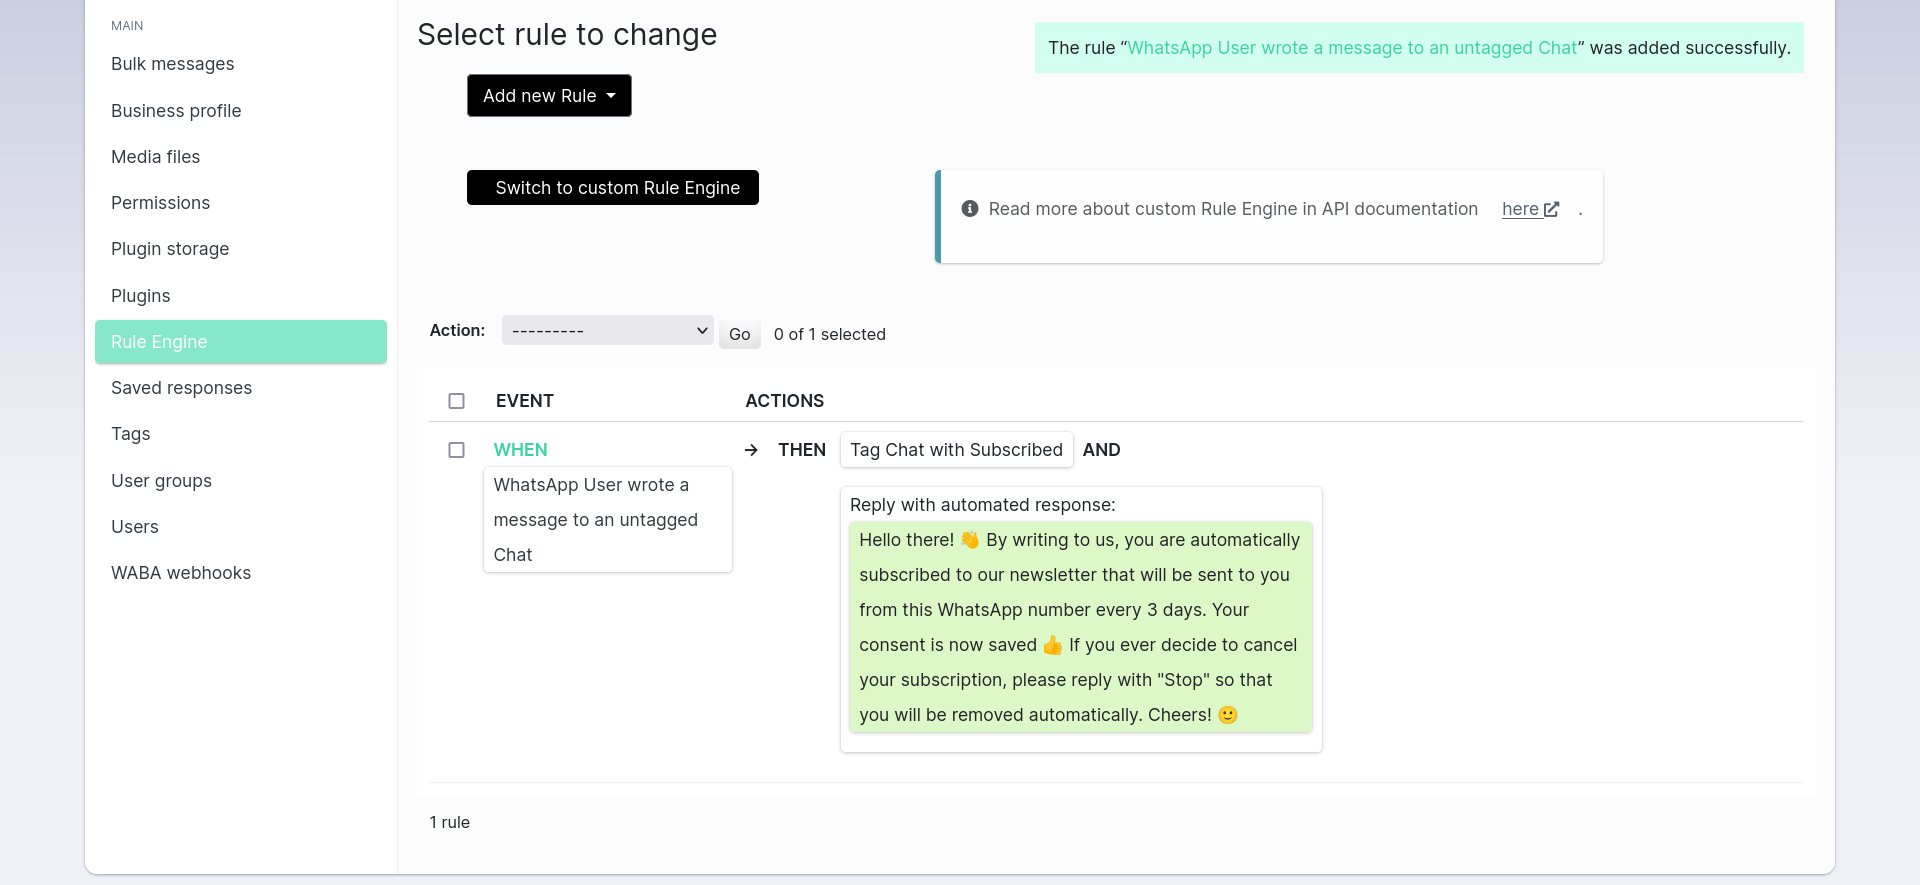
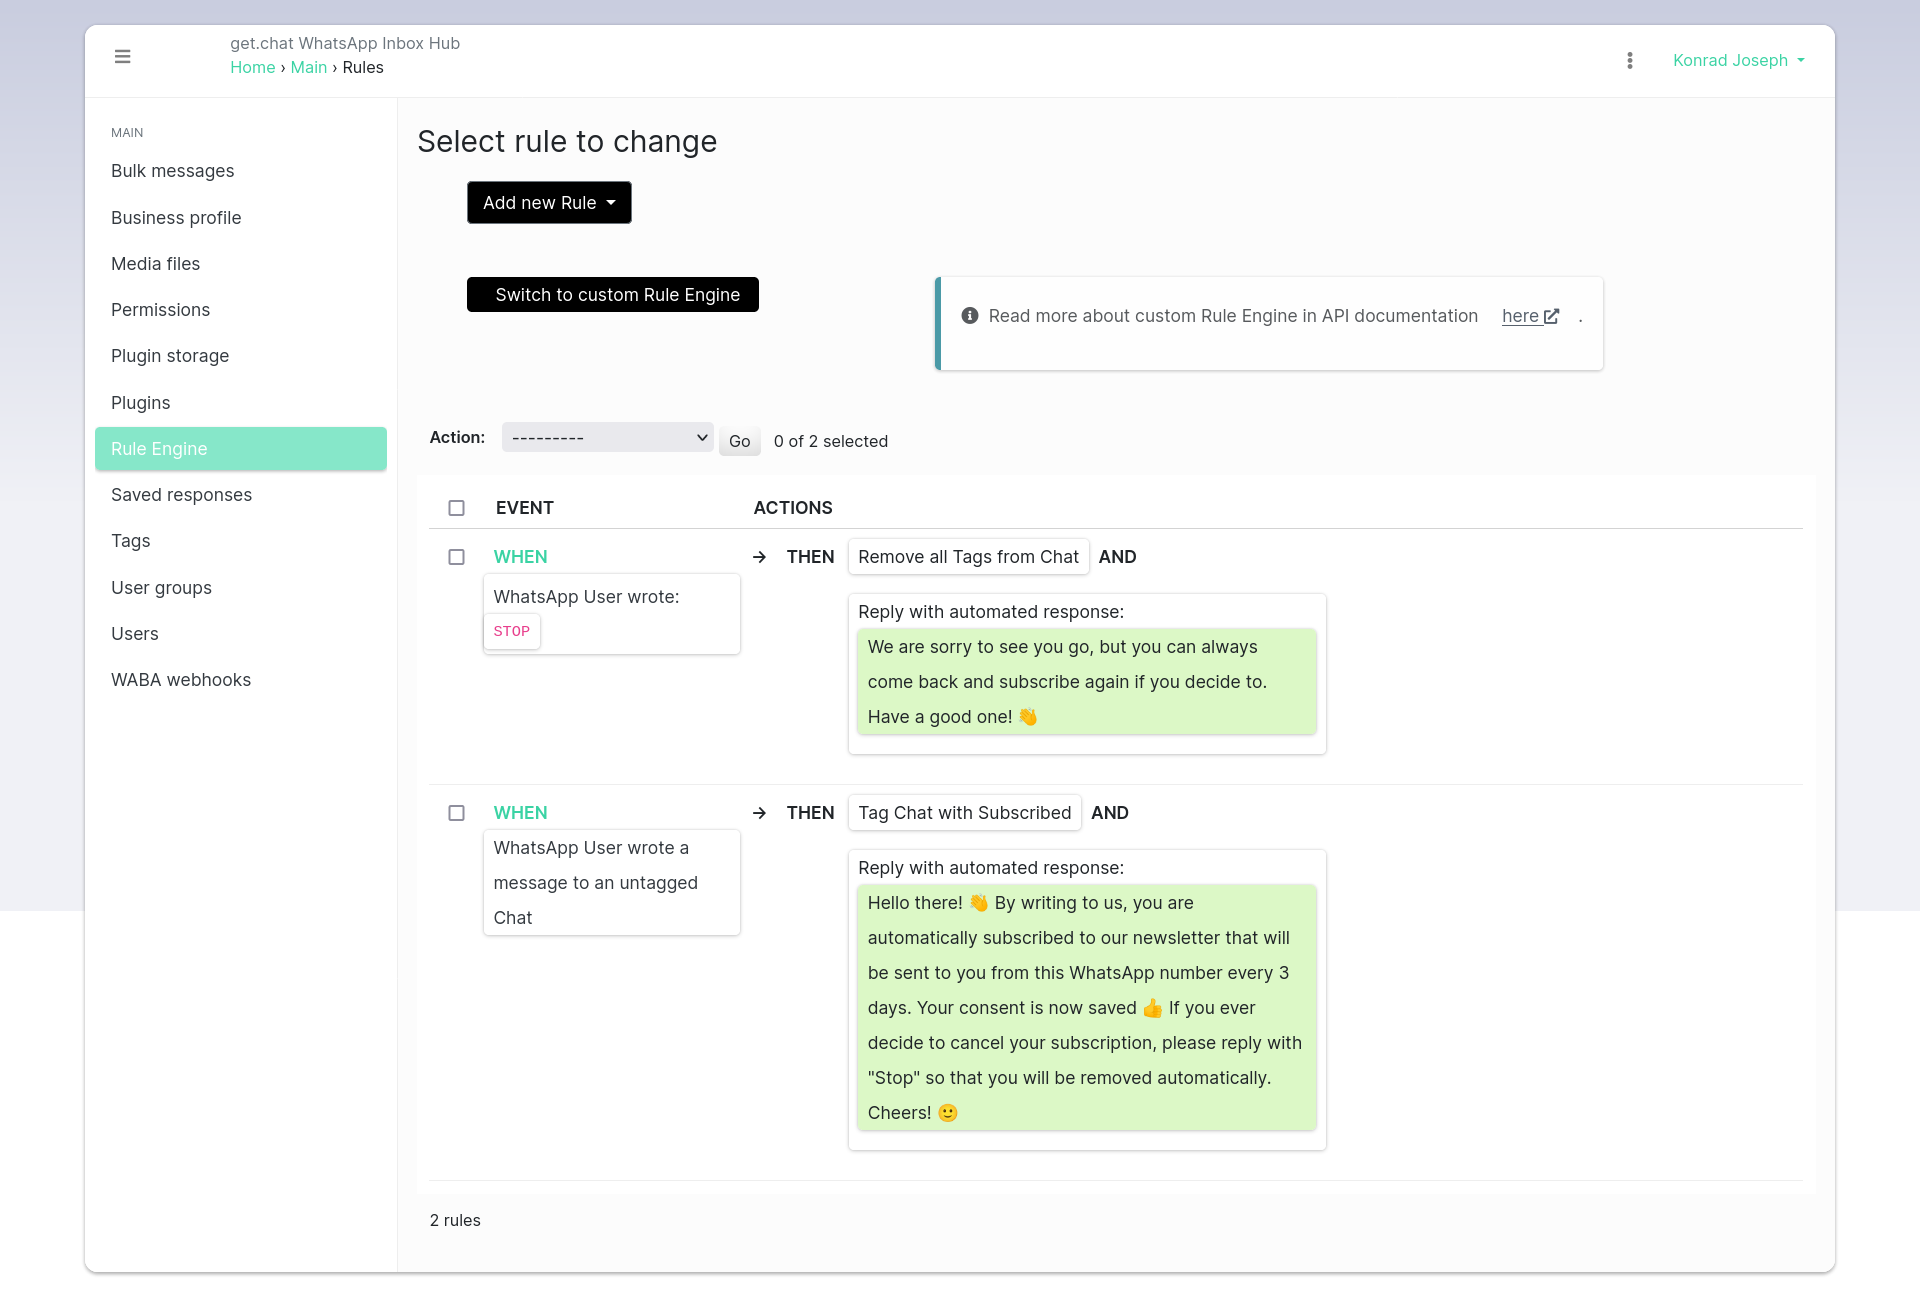
That looks nice. What we can see here is we created a Rule that automatically Tags the Chat with “Subscribed” tag, whenever WhatsApp User wrote a message to us and it’s not yet tagged.
Good, but we’re only 50% done here. How to configure it so that they can easily unsubscribe themselves as well?
3. Create “opt-out” Rule
The “opt-out” Rule will be created in similar way but with different options. Again, use the Add new Rule button, but this time choose the following option: “WHEN: WhatsApp User wrote specified phrase or keyword”.
We want the user to be unsubscribed on the “Stop” keyword, so on the next page type “Stop” keyword into the “Exact phrase or keyword” field:

Note that keyword check is case-insensitive - “STOP”, “Stop” and “stop” all work the same way.
Allright, so we have the action trigger specified. Now to the action itself - we need to unsubscribe our user. For this to happen, you can use either Remove Tag from Chat: option or Remove all tags from chat option. In our simple case it doesn’t really make difference, but in some more complex setups often the second option is used with combination of the “Stop” keyword, so we will use it here as well.
Done? Almost there. Remember about automated response, to keep the communication with your recipients crystal-clear. How about something like:
We are sorry to see you go, but you can always come back and subscribe again if you decide to. Have a good one! 👋

That’s all! You can now click Save and you will see a preview of your entire setup.
4. Give it a try!
OK, we are done, but… how does it work actually?
Let’s open up WhatsApp messenger and write a test message into our inbox. We have a nice confirmation message. If we check that on the inbox side, we can see the user was automatically tagged and the tag is also visible on the list:
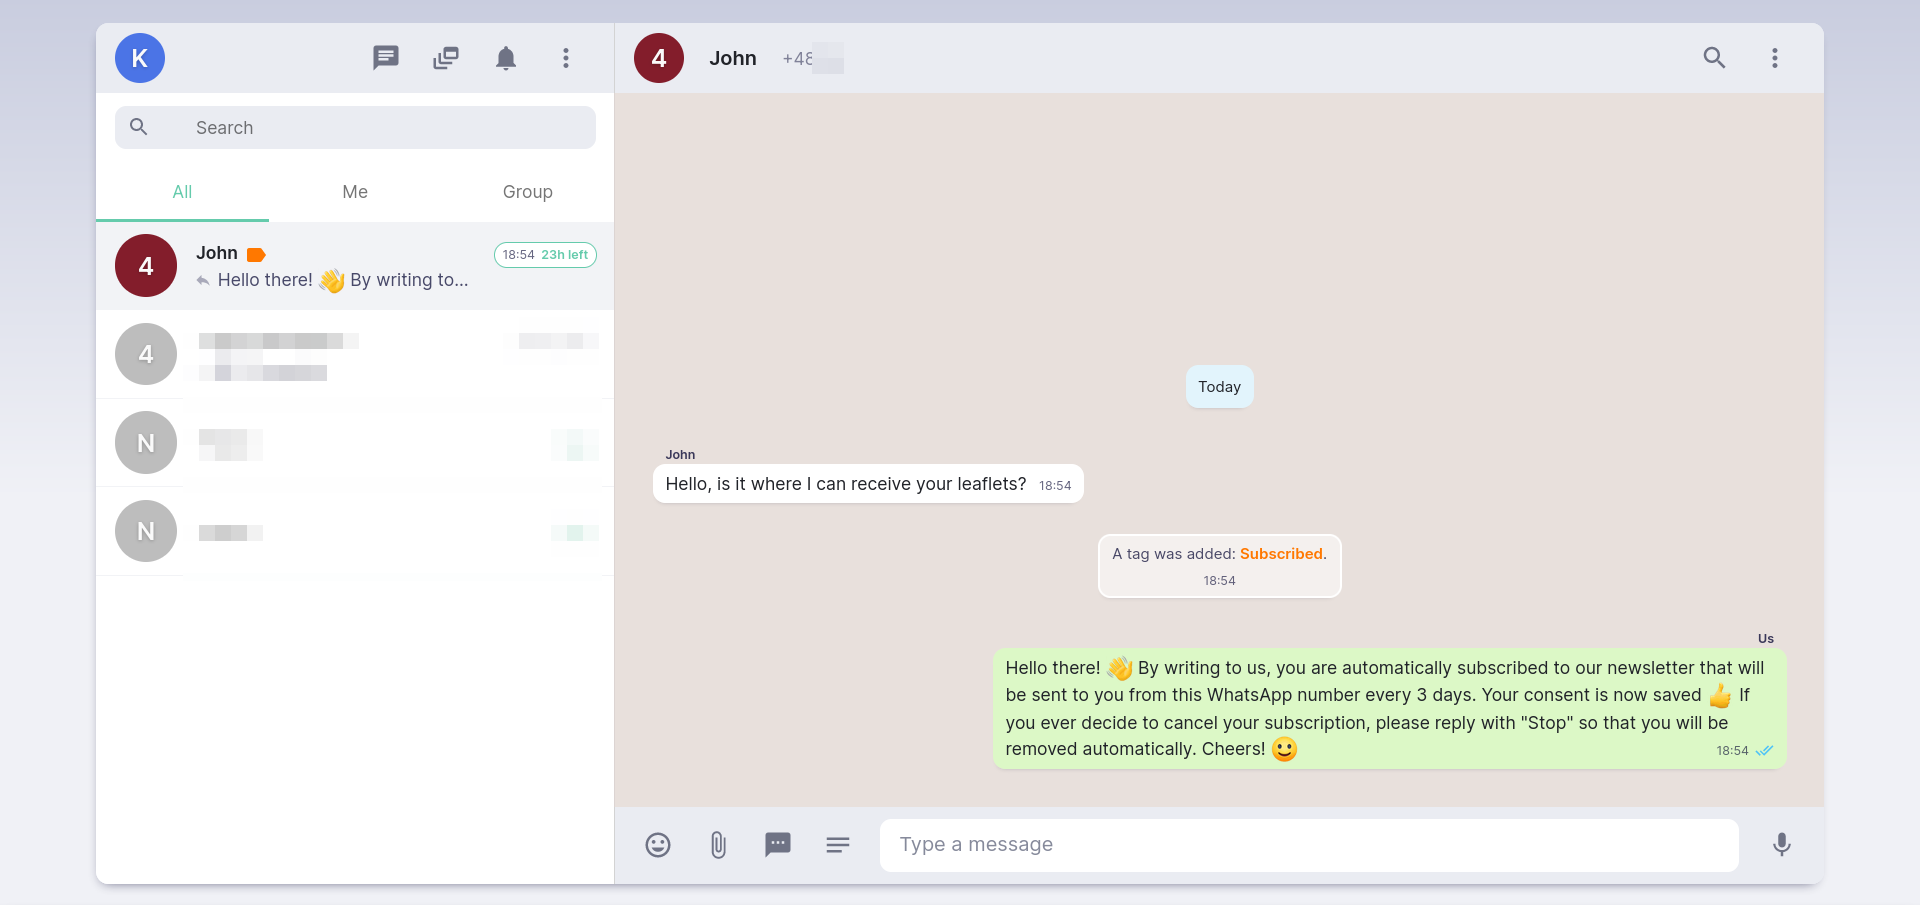
And this is how it should look on WhatsApp side (WhatsApp for Web is used here):

“OK, but I don’t care about those conversations. All I care is being able to send future messages to subscribers easily”, you might say. Yes, this will be our next check.
Let’s assume you made it to collect a few or more subscribers, and you want to message them all at once. In our example we will have only one subscriber, but let’s not get too sad about it.
On the inbox chat view, pick the Templates option - it doesn’t matter on which Chat you will pick this option:

Choose the template you want and click Send.
In the next step, you will have a popup with template form. In our example we used a template that is sending a PDF file to the user. For such template, you upload the PDF file directly using the form. This template mentions what is the offer expiration date, so we provide this parameter as well (2042-04-02):
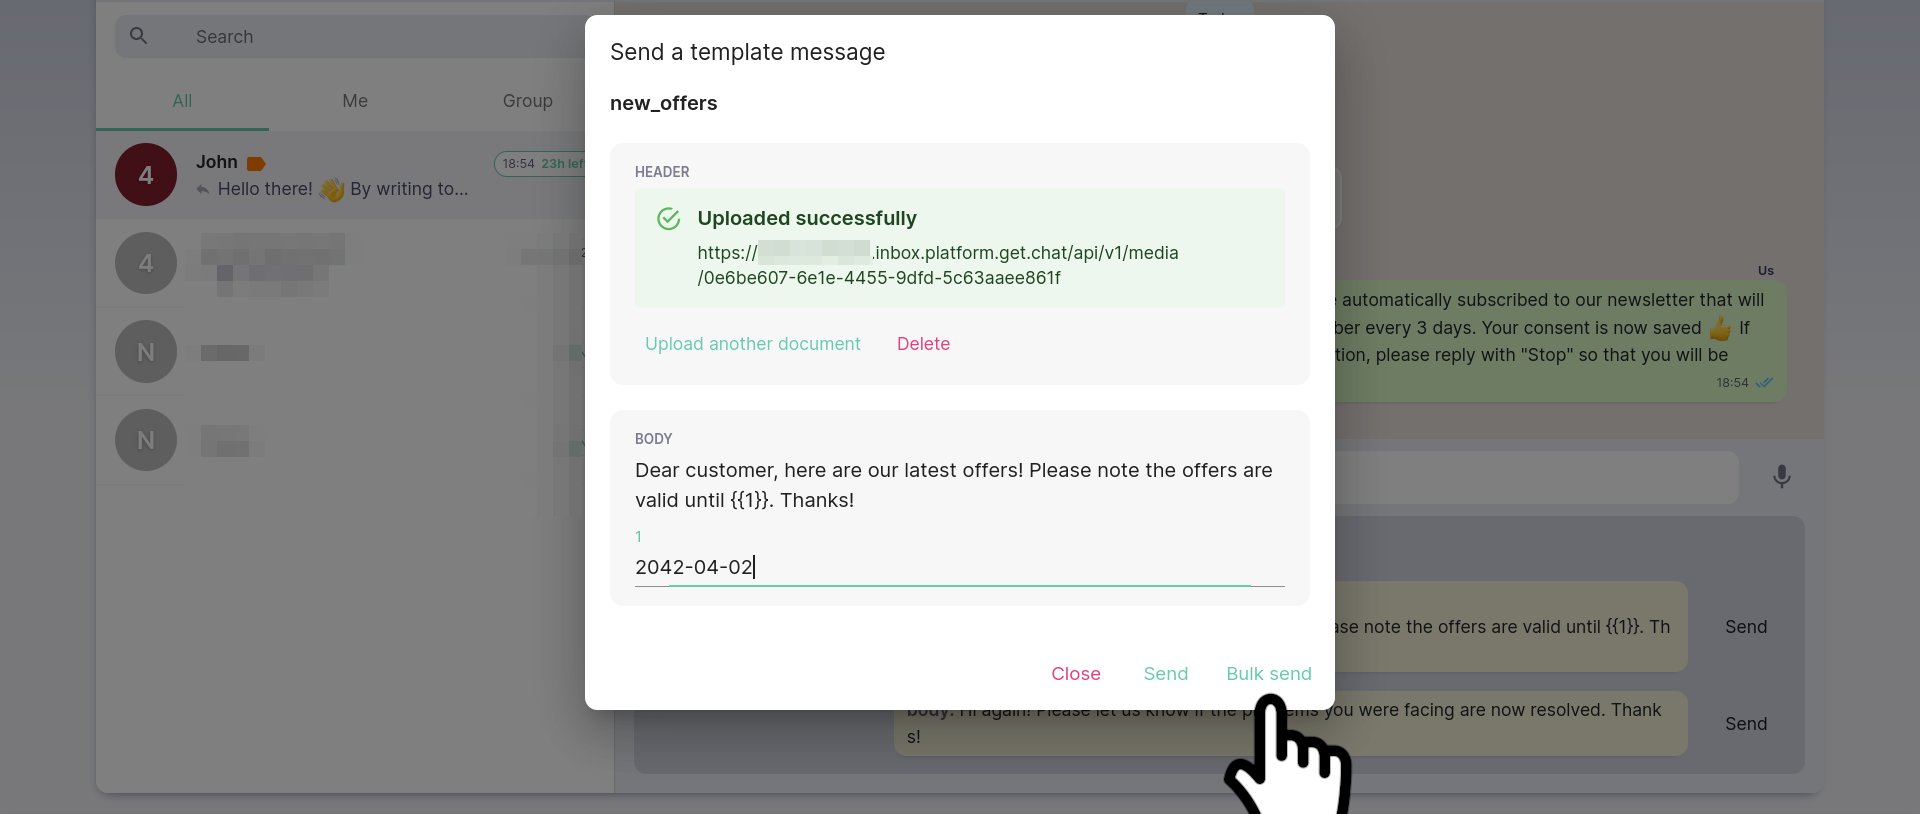
Click Bulk send. This will lead you into UI that allows you to target users directly or target them by tags. The second option is actually what we are interested in - click Subscribed tag and then click the Send button:
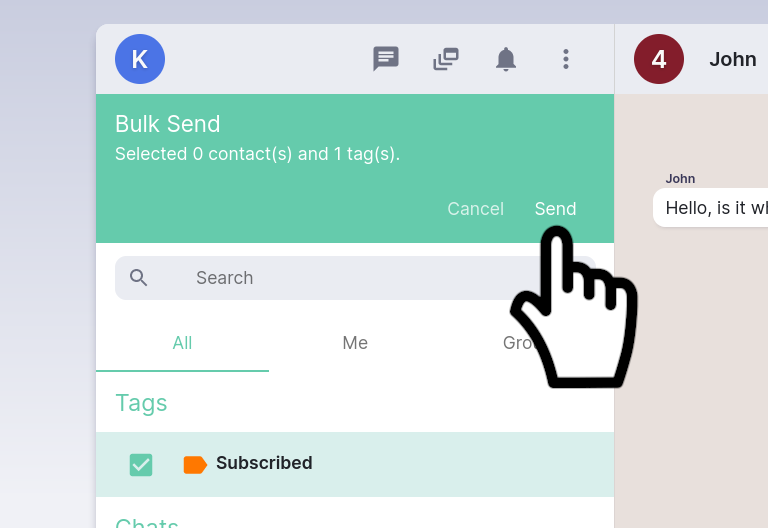
When you will have your dozens or thousands of subscribers here, they will be targeted just with a single click all at once!
On the lower left you will see the progress bar of all targeted users, so the hundreds or millions you targeted right now (or only one as on below picture):

And this is the result your WhatsApp subscribers should end up with, based on the template we used:
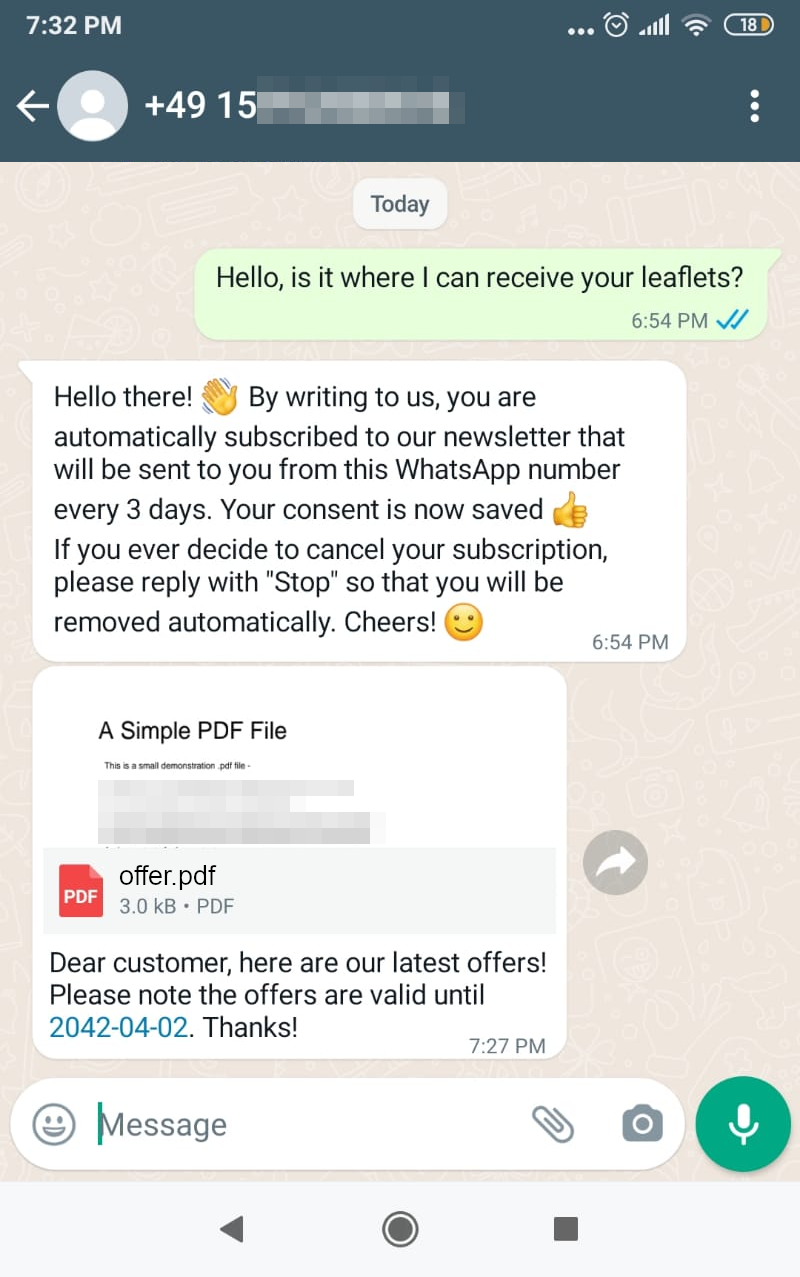
Cool! Now, let’s see what happens when a User decides to opt-out by writing a Stop message:
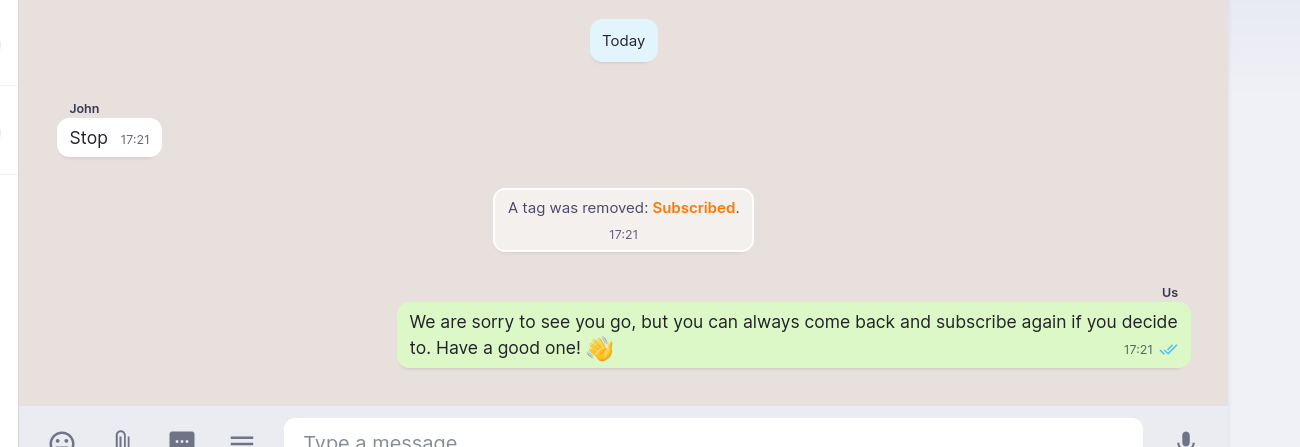
After they decide to, the User is automatically untagged. When targeting Users by Tag in the future, this User won’t be considered.